This post may contain affiliate links. This just means I may receive a small commission at no extra cost to you for helping them promote their product or service. I don’t endorse any services I don’t personally use or recommend.
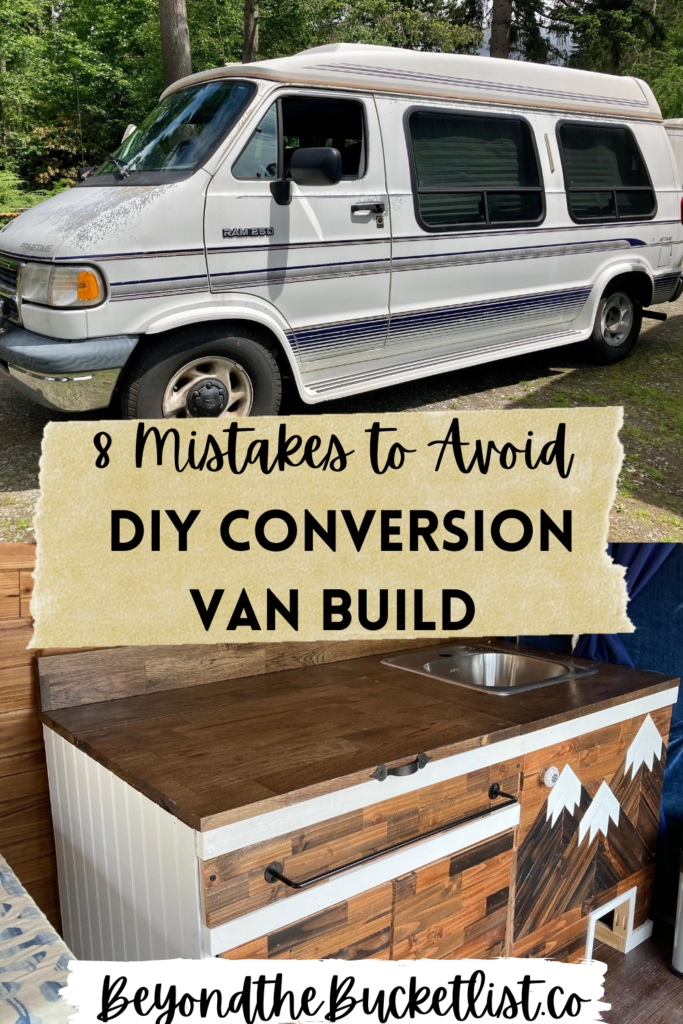
Thinking that maybe van life is the life for you? Building your dream camper van is easier than you think (cheaper too). But there are some serious pitfalls that many first-time builders (like myself) can easily fall into. These 8 serious van build mistakes can easily be side-stepped if you prepare ahead of time.
2020 has become the year of the road trip. More people than ever are exploring the wonders in their own backyard & so far more than 25 MILLION Americans have purchased an RV or Camper Van.
We did.
& spent 6 weeks turning our 1994 Dodge Ram Van into our little home on wheels. It went surprisingly smoothly considering neither of us had any experience in carpentry, electrical, or any kind of wood-working.
Disclaimer: Although these tips are specifically for those converting a conversion van or other used van, they are still helpful to those who plan to convert a Sprinter or Cargo Van.
Let’s get into what we would do differently on our next campervan conversion.
How to Avoid the Biggest Conversion Van Mistakes
Before you go through the effort of converting your own van it’s important to know what you’re getting yourself into.
Test Out Van Life Ahead of Time
Renting a Van More Your Style??
Lucky for you Travellers Autobarn has budget-friendly super comfortable van rentals that are fully equipped for any adventure. If you’re thinking a van build might be in your future, I always recommend test-driving van life before you invest the big bucks. This is my favorite van rental company for the price in the USA.
Van life isn’t for everyone. But there are loads of reasons to give van life a try.
Invest in a Comprehensive Van Build Guide
Building a van is overwhelming. It often involves countless hours scouring Youtube, blog posts, and facebook groups looking for semi-helpful information. It’s a huge project and when we first purchased our van we didn’t even know where to begin. What van layout should we choose? How do I build everything from scratch (from window covers to shelving)? Should I choose sheep wool insulation or polyiso boards? & these are just the easy questions. Katie & Ben from Two Wandering Soles provide the answers. They created these super neat van build breakdowns to help guide us through the process.
& if you’re a first-time builder I highly recommend their complete van conversion academy.

Investing in Van Conversion Academy Includes…
- Clear blueprints for all the most complicated van systems (I’m talking about you electrical) complete with online shopping lists where you can purchase the exact parts you need.
- Tons of layout options to choose from. They even provide exact blueprints and measurements that you can copy for multiple van designs!
- Access to an exclusive Facebook group of fellow builders where you can ask all the questions your heart desires.
- A COMPLETE step-by-step walk-through on how to build your van from fan installation to sub-flooring to sound dampening to water and propane. They’ve thought of everything including what the most common pitfalls are with each step and how to avoid them.
- Lifelong access to ALL this content. & loads more I won’t cover here.
If you invest in ONE thing before you begin your vanbuild, make it this master course. Katie and Ben helped us build our dream van and whether or not you spring for a Sprinter (we didn’t) or something more budget-friendly they will make sure you get the results you want before hitting the road.
8 Van Build Mistakes We Made
These are the 8 mistakes we made during our DIY van build we wish we would have done differently.
1. Label all the Wires During your Demo.
The first step in every van build {for those of us that chose the used van route} is demolition. You’ll have to remove EVERYTHING. Seats, wood panels, carpet, and about 10,000 screws. This will undoubtedly leave you with loads of exposed wiring you may or may not plan on keeping.

& it’s so important that you label each wire as you disconnect it. Because once the inside is bare you will NEVER be able to recall what each wire originally attached to.
This way you’ll know what you want to keep & what you want to toss.
Our Van Build: One of my favorite features of the van that we kept is the automatic door lock/unlock by the bed. We wired it into a new position above the bed so we can access it easily before going to bed at night.
2. Have the Heater Professionally Removed.
So, you’re deep into the demolition & you uncover this dreaded massive black box. A surprisingly common heating system in conversion vans.
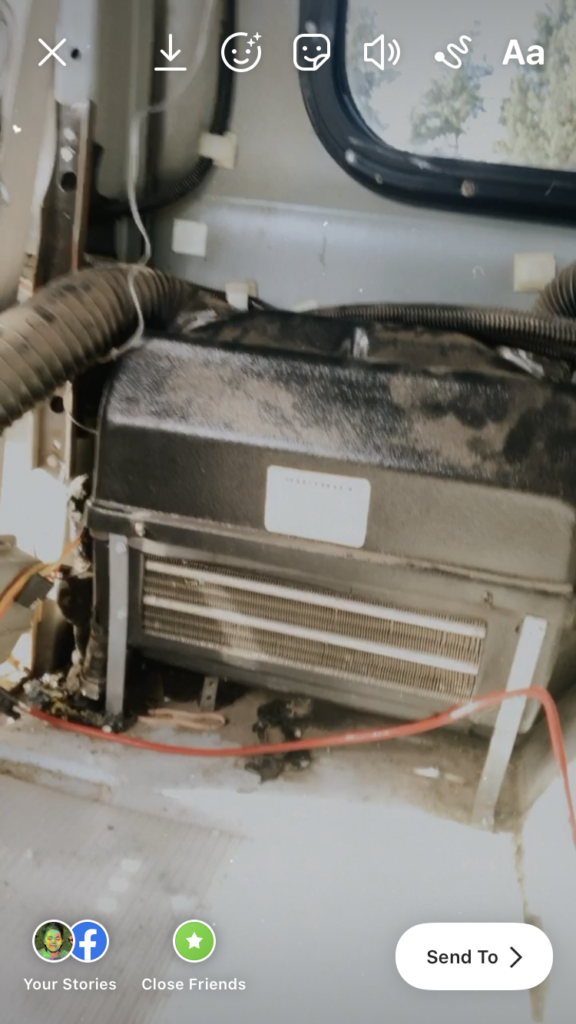
If you’re like us you get to work unscrewing it. Until we heard the tell-tale hiss of compressed air becoming steadily more decompressed.
Turns out this heating/air conditioning device is more difficult to remove than we originally thought & involved A LOT of tube removal & capping of components in the engine. We did it ourselves & it may have led to some mechanical issues just a few weeks later.
I don’t regret removing it. It takes up loads of valuable space. But at least have a professional opinion on what it would take to remove it properly.
3. Take All Your Measurements & Make a Plan.
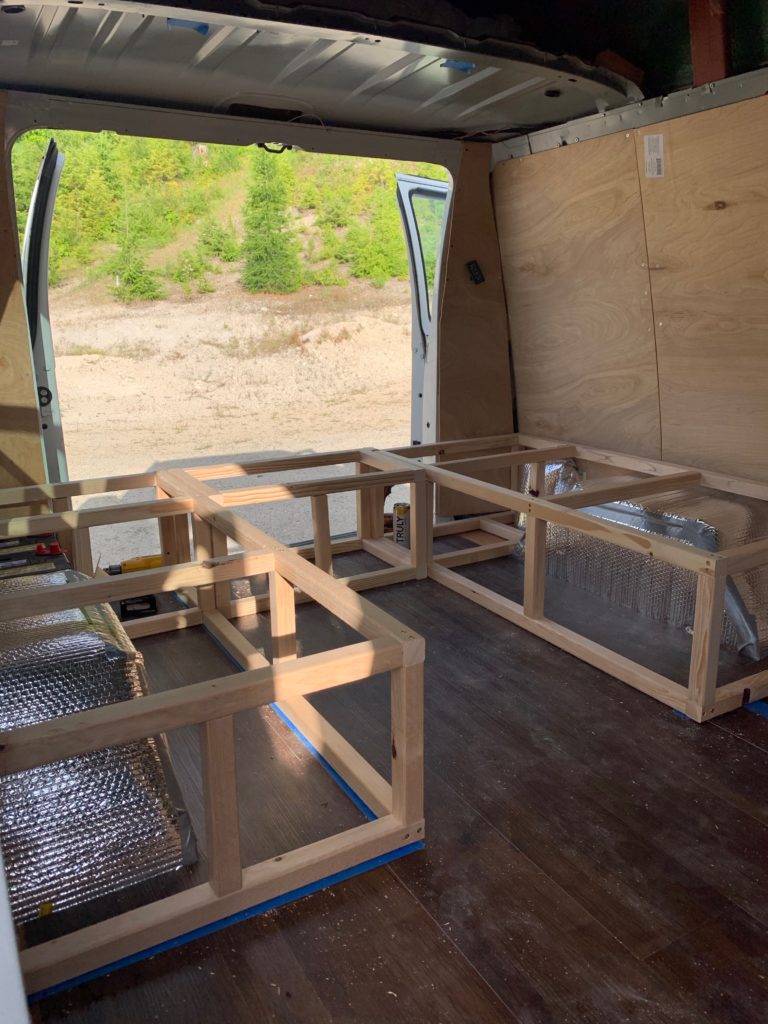
As soon as your van is empty you should take a full set of measurements & sketch out your plan. Van builds are all about utilizing the space you have. Every square inch of it.
Don’t get ahead of yourself & make sure to map out everything you want to have in the van and create specialized storage for it all.
4. Take the Time to Make Templates.
We never did.
& that meant constantly having to remeasure & carefully cut wood and insulation to fit our walls and windows. If you make a window template or wall template or even floor template in the very beginning it will save you so much time & energy. It’s a lot easier to trace & cut than to try and nail the exact measurements every time.
You’ll want window templates to make window covers for Stealth Camping in cities and National Parks.
5. Double Check for Leaks.
This happened to us accidentally. But thank god it rained.
Older used vans can leak at the seams or taillights or minuscule cracks in the ceiling OR around the ventilation fan you just cut & dropped into the ceiling.
After a massive downpour, we realized that there was a teeny amount of moisture seeping in from two side seams on the van body & around some of the screws securing our fan in the ceiling.
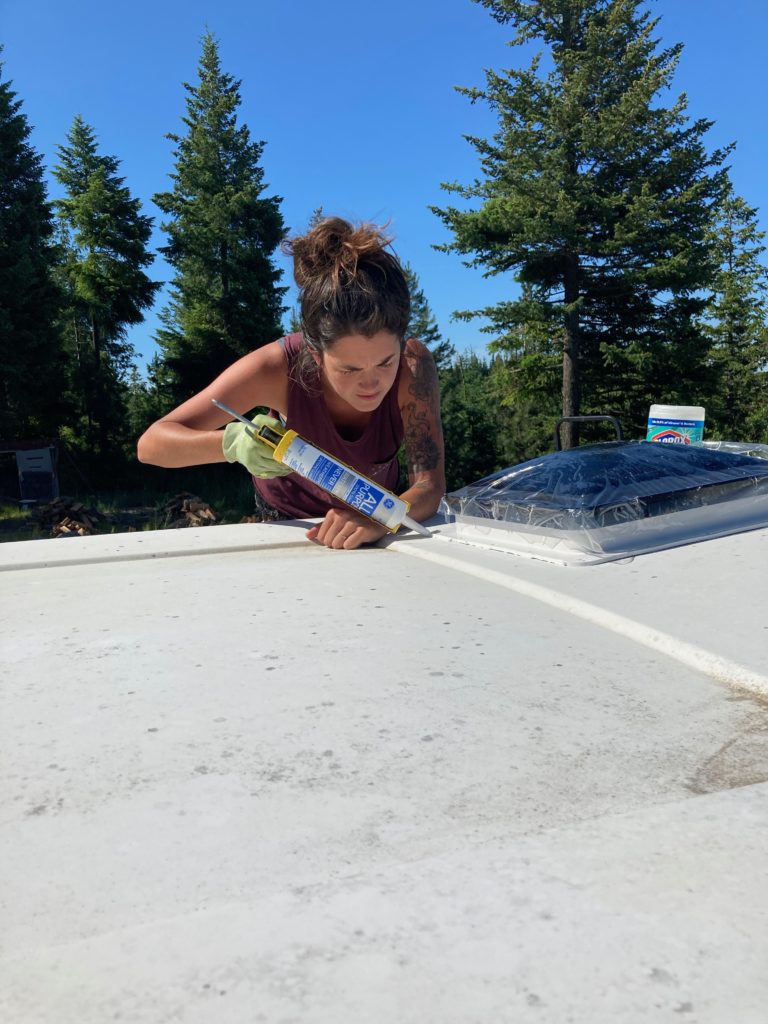
If we had put up walls over these areas without testing for leaks that moisture would have accumulated & turned to mold in no time.
Our Fix: Caulk. Silicone waterproof caulk. We ran a bead along the seam on the outside of the van & a thick coat on all the seams around our fan including over the top of the screws.
If the weather isn’t on your side just soak your van thoroughly with a hose to check for any moisture leaks.
6. Build the Overhead Cabinet Area BEFORE You Finish the Walls.
This was our most painful mistake.
Our van had built-in overhead storage above the cabin & in the rear. & like dummies, we threw up our wood-paneled walls with plans to build cabinets for the overhead space later. Unfortunately, it was near impossible to utilize that space fully once we had boxed it in.
What we were left with: We managed to build small boxes to fit into the space, but it only uses about 1/2 the potential square footage compared to if we had built it before putting up the walls.
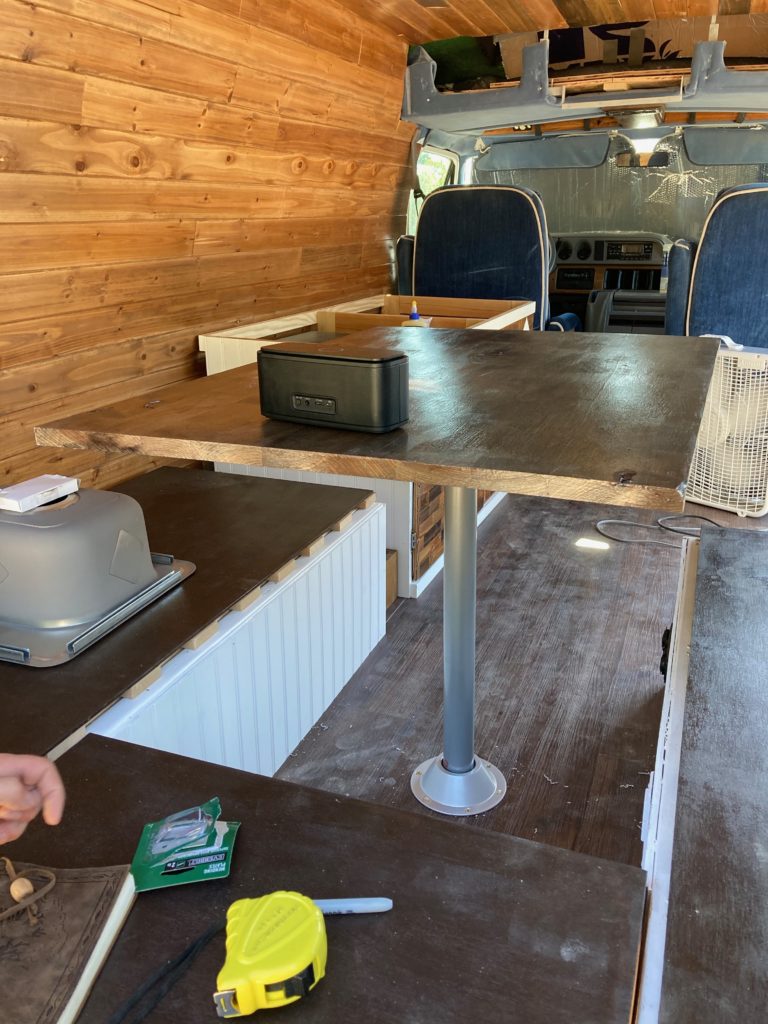
The Fix: If you also have these awkward overhead spaces, build in the cabinets during the framing stage of your van. Don’t leave it for later or you risk scraping up your walls & losing valuable storage space.
7. Do Your Electrical Early.
Obviously, you need to design & construct your electrical system before you put up your walls. But I would recommend finishing your electrical before you even finish framing them.
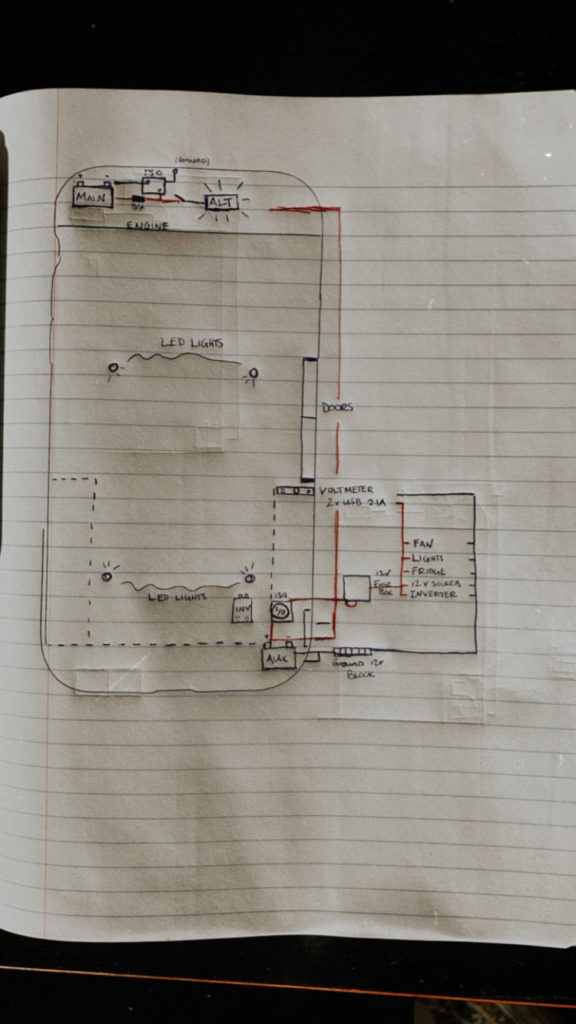
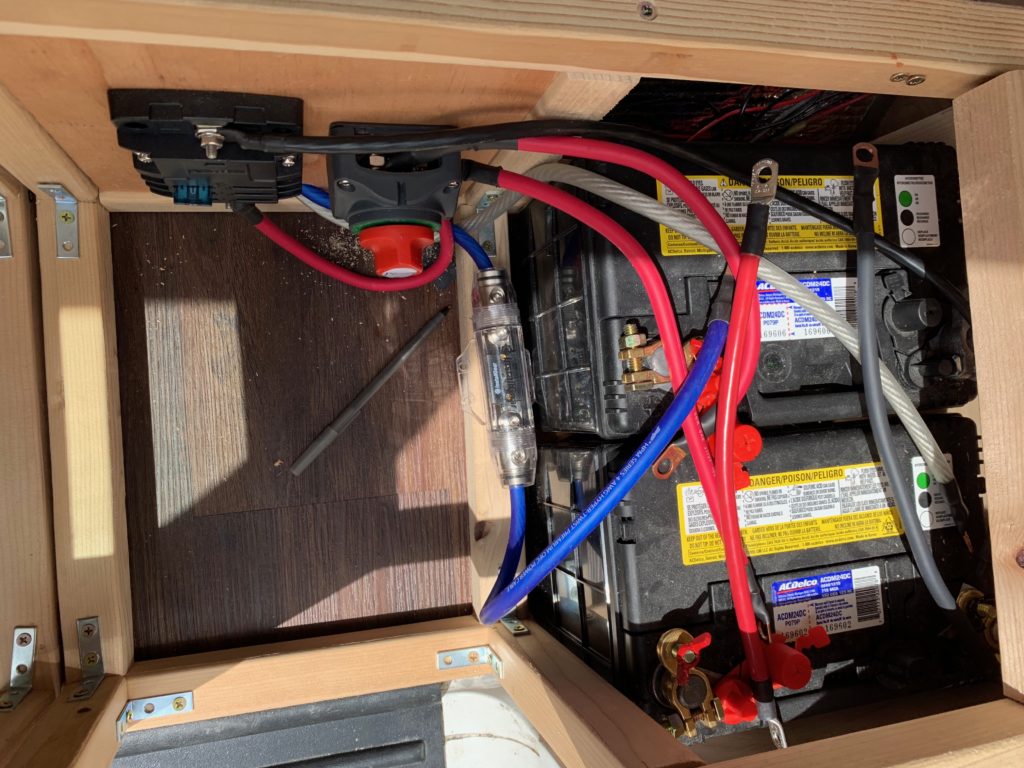
This way you can tuck your wiring securely flat against your van body. & it will be 100% hidden when you’re finished building.
A great investment if you decided to skip solar panel hookups on your van electrical system is a Bluetti EB55. This external power supply easily hooks up to solar panels so you can upgrade easily later + give you off-grid capacity.
8. DO NOT Skimp on Insulation & Ventilation.
Some van builders debate the merits of insulation and I’ll be honest I definitely considered skipping the step altogether. But I’m SO GLAD we didn’t.
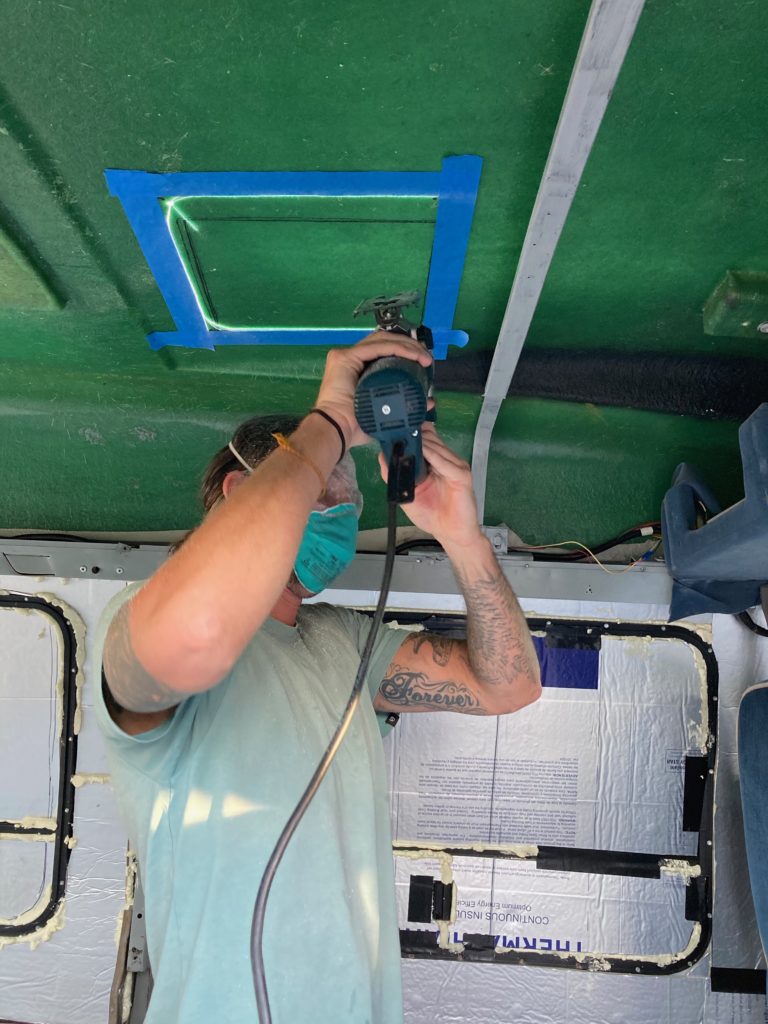
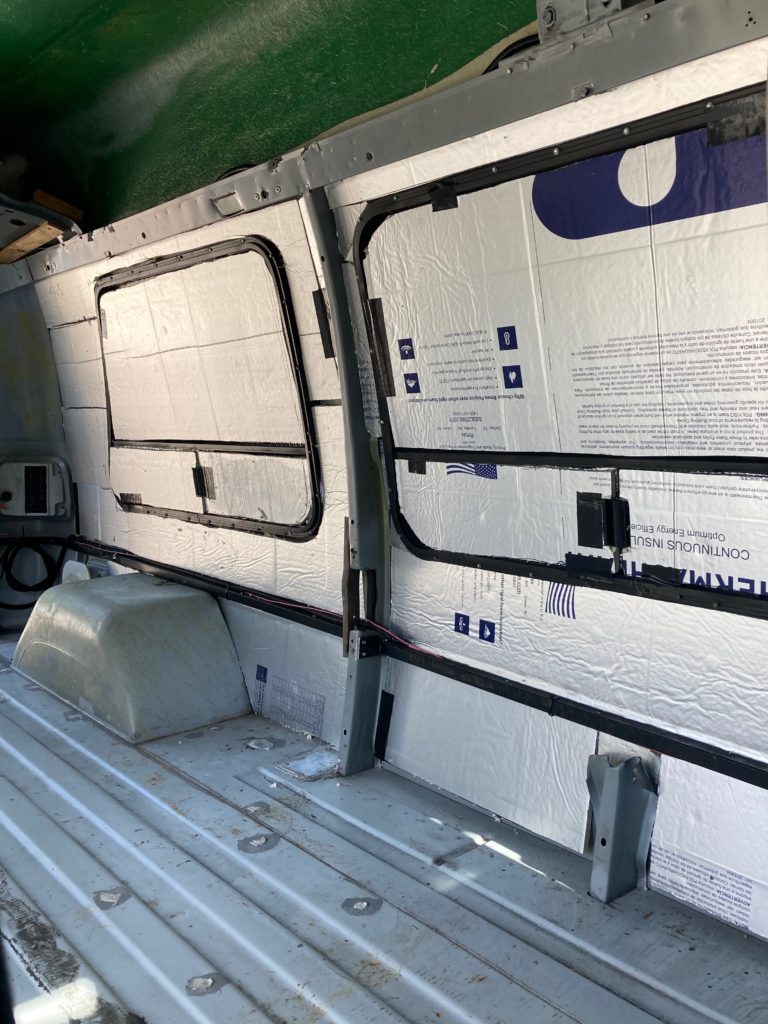
Insulation keeps your van cool in the heat & warm at night when temps drop. & will overall make your van way more comfortable to sleep in. So, make sure you research different insulation types & choose one that works well for you.
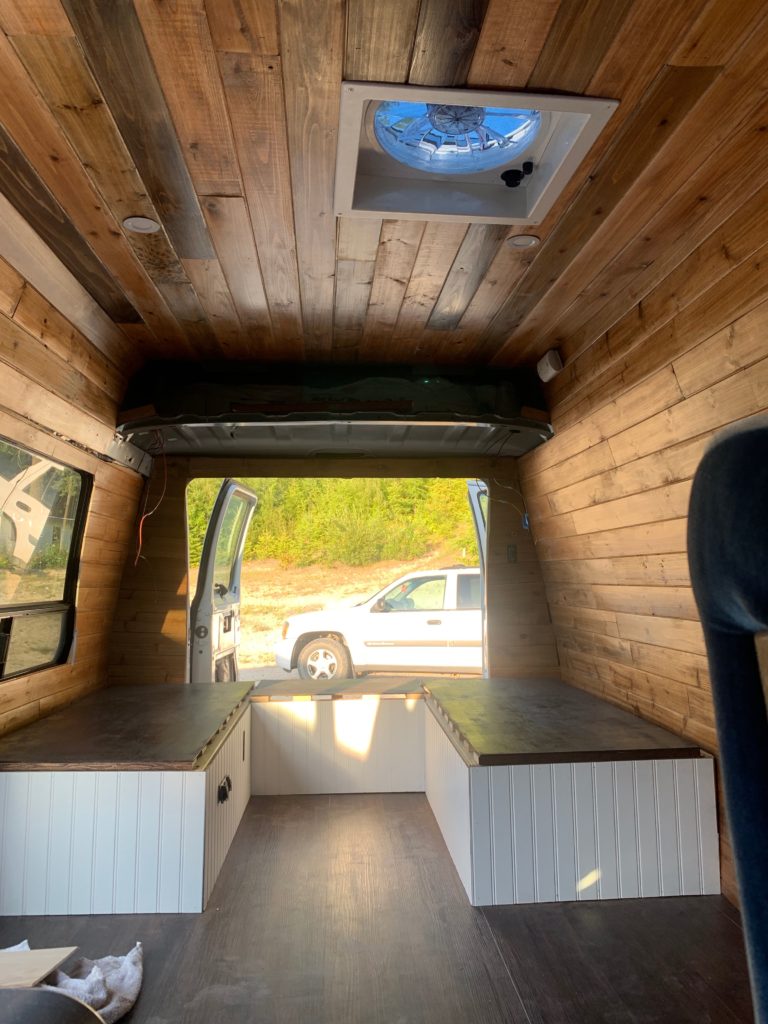
Our Insulation: We used Poly-Iso foam boards for the walls & ceiling with Gaps & Cracks foam filler to get in all the tight spaces & cracks. To cover our side windows we used a combination of Reflectix & Poly-Iso foam boards. On the curved parts of our roof, we used typical insulation batts. The fluffy stuff you’re likely familiar with. You have to leave a small airspace for Reflectix to work properly so that’s good to keep in mind.
Ventilation is equally important because moisture is the death of neatly crafted vans. & condensation is gauranteed without proper ventilation while you sleep. Make sure you have two points of ventilation to create airflow.
While we were exploring Florida in our van, the moisture caused a lot of our wood to swell in size. Fortunately once we moved to less humid areas it all went back to normal.
Our Ventilation: We have an overhead fan {Fantastic Fan} & a small slide window near our bed in the rear for optimal airflow.
The more comfortable your van is, hot or cold, the easier it will be to hole up inside while stealth camping in cities.
Always Prepare for Set Backs
Although building a van is do-able for most determined builders, you will always have frustrating setbacks. You’ve got to be willing to roll with the punches.
We built most of our furniture twice. Whether it was using a wrong joint or accidentally hinging doors the wrong way.
We also forgot to put insulation in one portion of the van before we covered it with our wood panel walls. Which meant getting creative to shove it in there.
Mistakes happen. But you’ll be able to pull it all together in the end.
Our Conversion Van Before
Click here for a complete cost breakdown on how much we spent to get our van in top-top shape.
Our Conversion Van After

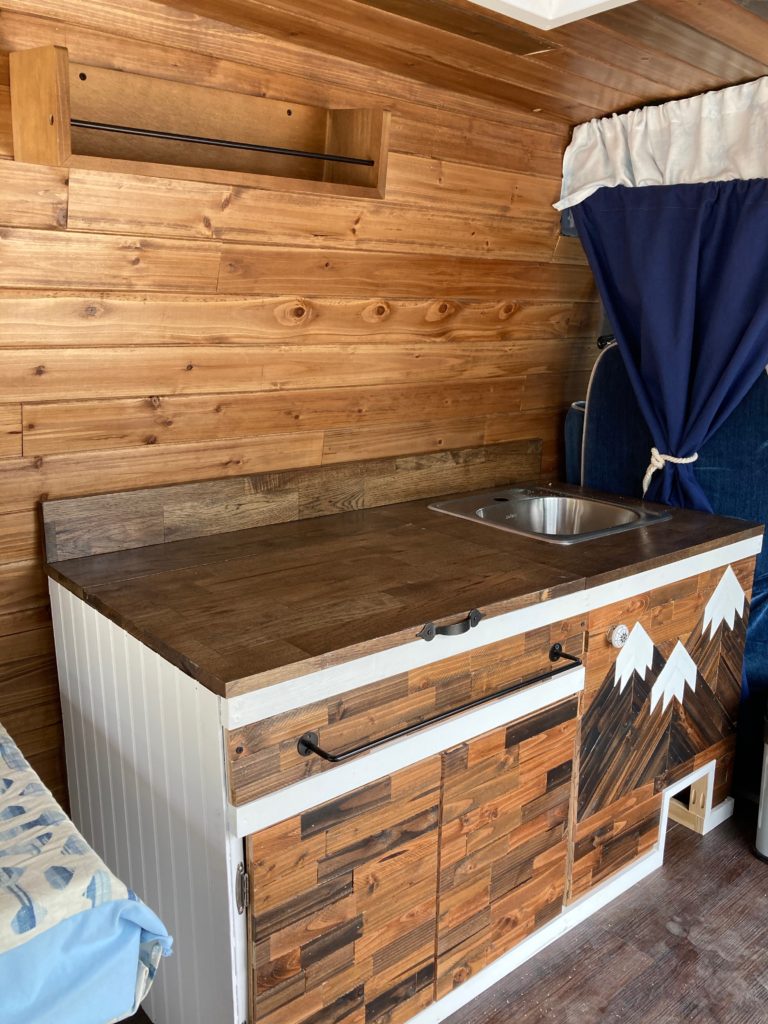
Overall, we love how our van build came out. & fortunately the mistakes we made we’re mostly minor & easily fixable. These common conversion van build mistakes are easily avoidable if you know where the pitfalls lay.
Want to Take the Ultimate USA Road Trip??
Sign up for my email list & I’ll send you my MASSIVE Google Map filled with 400+ destinations across the United States to help you plan your perfect van road trip.
I promise not to spam you with excessive emails. & you’ll also receive exclusive content that’s not shared on the blog.
& Here are a few more road trips worth checking out.
Now that you’re ready to build your very own van be sure to check out all the van life essentials that you’ll need before you hit the road.
Please share with anyone you know who is planning on taking on the task of converting their very own little home on wheels. & feel free to email me with your questions before you start a build of your own.
geena@beyondthebucketlist.co
Really good content here. Thanks 😊
Good stuff to know; very helpful.
Mandy, These tips are great, especially the electrical diagram and seeing the van at various stages. You were brave to take on a van that needed demo work. What I appreciate the most (besides the final woodwork and the great mountain inlay) is that you are honest about mistakes-which most of us make-and about van life not being as glamorous as some make it out to be. So glad to find travelers who are focused on the journey instead of their persona.
Thank you so much Anne!! I think it’s important that people interested in the van lifestyle get accurate info that’s doesn’t glamourize the process. Otherwise, they’ll give it a try and be very disappointed haha
Oops meant the prior comment to be for Geena, not as a reply to Mandy. 😵
Please capitalize God.
Great tips we tried doing this about 11 years ago. We had an entire camper roof repair project in our driveway for about 6 months. Thought we had it all planned out until we started taking things apart. The 3rd day our roof sprung a leak due to a repair we were doing in the back we managed to get the roof repaired with a couple gallons of rvroofmagic and then we tackled the electric which turned out to be the longest part of the project. We did finish but definitely not what we had hoped for.
What if you’re somebody with no experience building or planning, no tools nor anybody that knows how to do this stuff? How do I get this done with no resources?
I am on my second van build. The first was a transit connect and the build wasn’t bad until I started traveling in it more. Wasted so much money n resources. Now I have a dodge ram 2500 and going very slow this time. Thanks for the tips cause they have saved me headaches.