This post may contain affiliate links. This just means I may receive a small commission at no extra cost to you for helping them promote their product or service. I don’t endorse any services I don’t personally use or recommend.
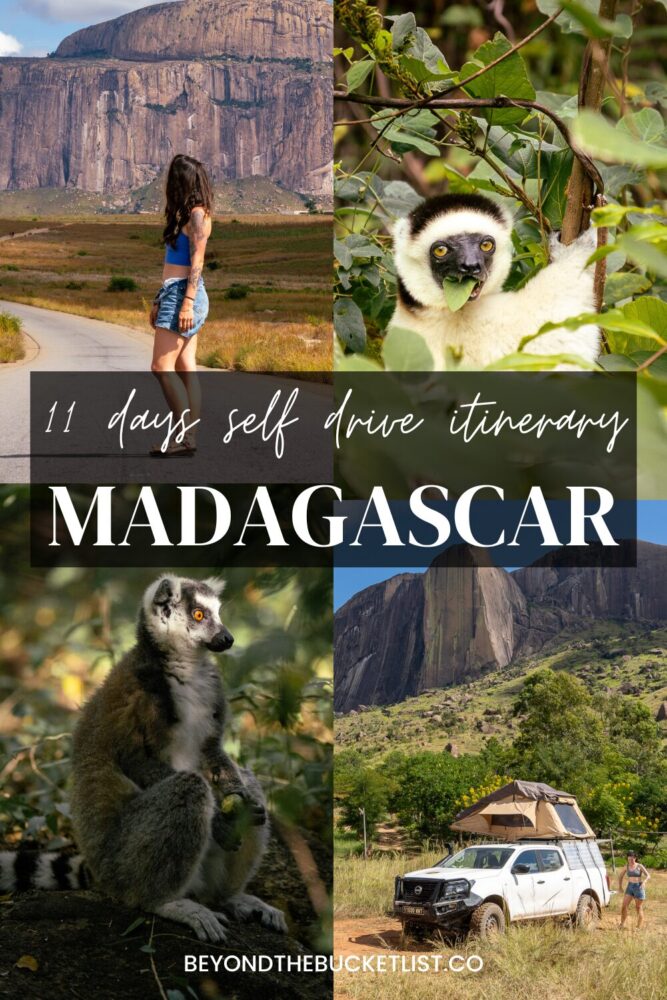
This is the best budget-friendly Madagascar Road Trip itinerary for travelers who want the freedom of driving but don’t want to venture too often into the mud-trenches of Madagascar’s off-road. It’s packed with iconic national parks, wildlife experiences, and traverses all of the country’s varied climates.
This is a jam-packed itinerary that moves at a breakneck speed and covers a lot of ground. But if you’re visiting Madagascar on a time crunch or on a tight budget, this is the trip plan for you.
Let’s start with some basics of the budget-friendly Madagascar road trip.
How To Save Money in Madagascar
I won’t lie to you, road-tripping by 4×4 is the most expensive way to independently travel in Madagascar. Many tour operators charge a comparable amount. But you lose all the adventure and freedom a rental car provides.
The key to a budget-friendly Madagascar road trip is speed. You need to plan a route carefully and then finish it as rapidly as comfortably possible. This is because while camping, food, even national park fees, are very affordable in Madagascar, your rental car will be your biggest expense.
Every day you have it, you’re paying for it.
So THIS particular budget-friendly Madagascar road trip route is quick. You’ll need to be ready to hit the ground running.
For more budget-friendly Madagascar road trip tips check out my full blog post on things you need to know before planning a road trip in Madagascar.****
Where to Rent Your 4×4: Road Trip Africa
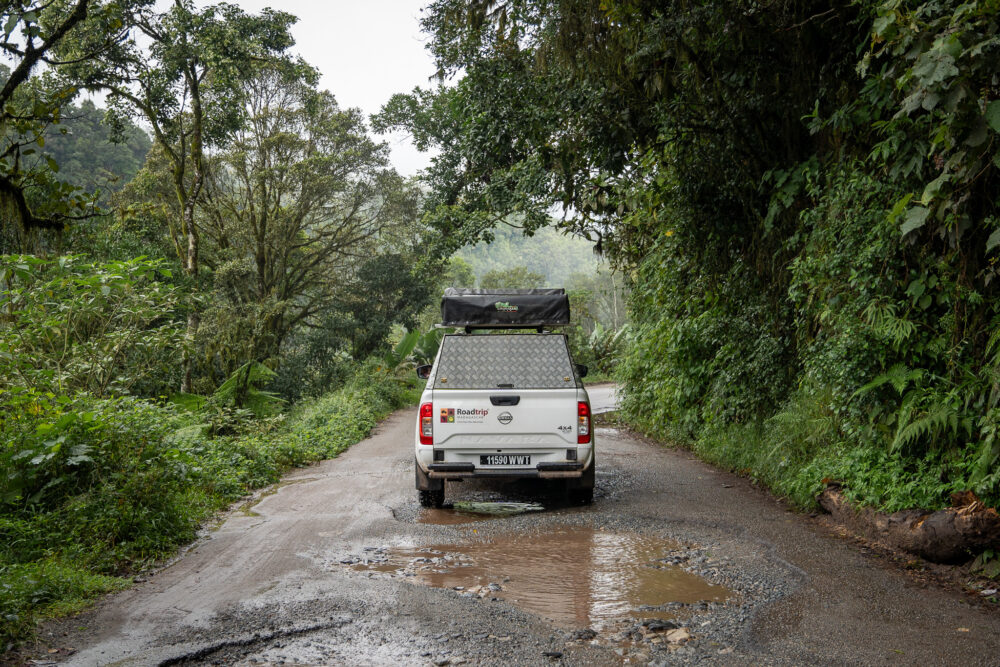
If you’re looking to rent a car in Madagascar, look no further than RTA. They offer a variety of vehicles suited for the rough Madagascar roadways.
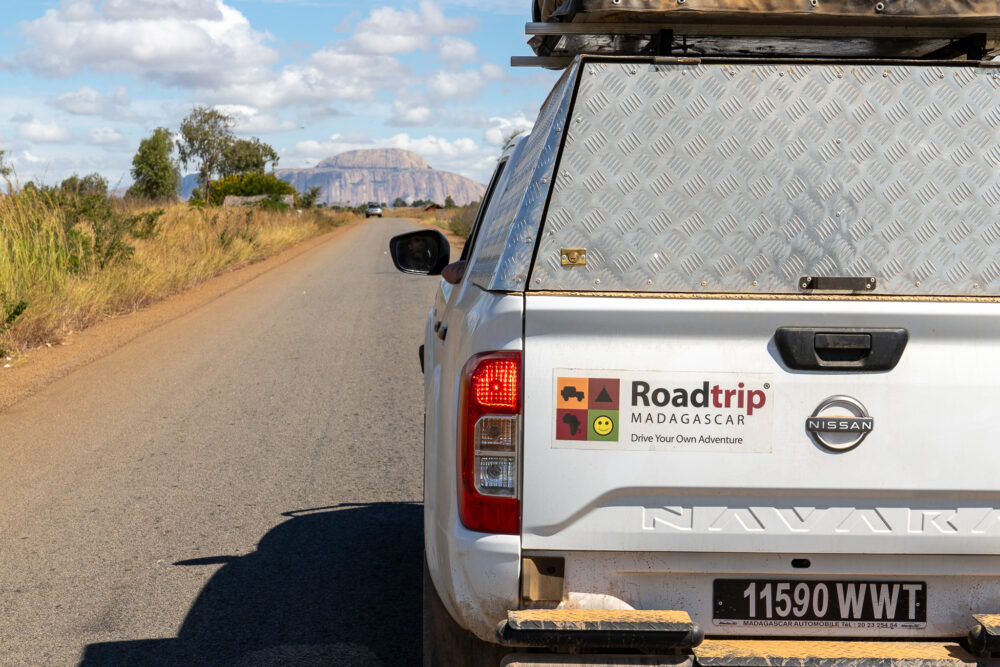
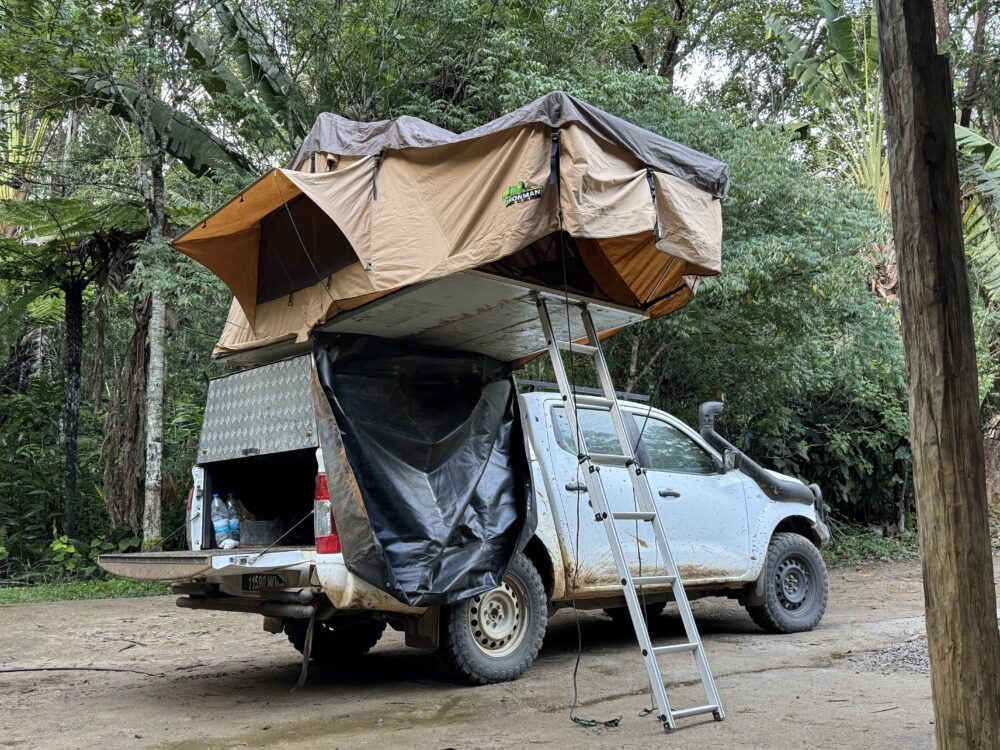
All the vehicles offered come with a ground tent, sleeping mats, sleeping bags, pillows, cooking stove, camping chairs, camp table, cooking utensils, road map, and the Bradt Madagascar Guidebook (which is essential in my opinion).
Besides having a great vehicle, I was really impressed with Road Trip Africa’s customer service. All their cars have tracking devices, so if you run into any trouble, they can send help right away. We didn’t have any problems on our road trip in Madagascar, but we did meet a Dutch couple who tore off their oil pan after hitting a stump. RTA told them to leave the car, hop in with us, and they sent a mechanic the same day to fix the car and drive it ahead to them—no delay to their trip at all.
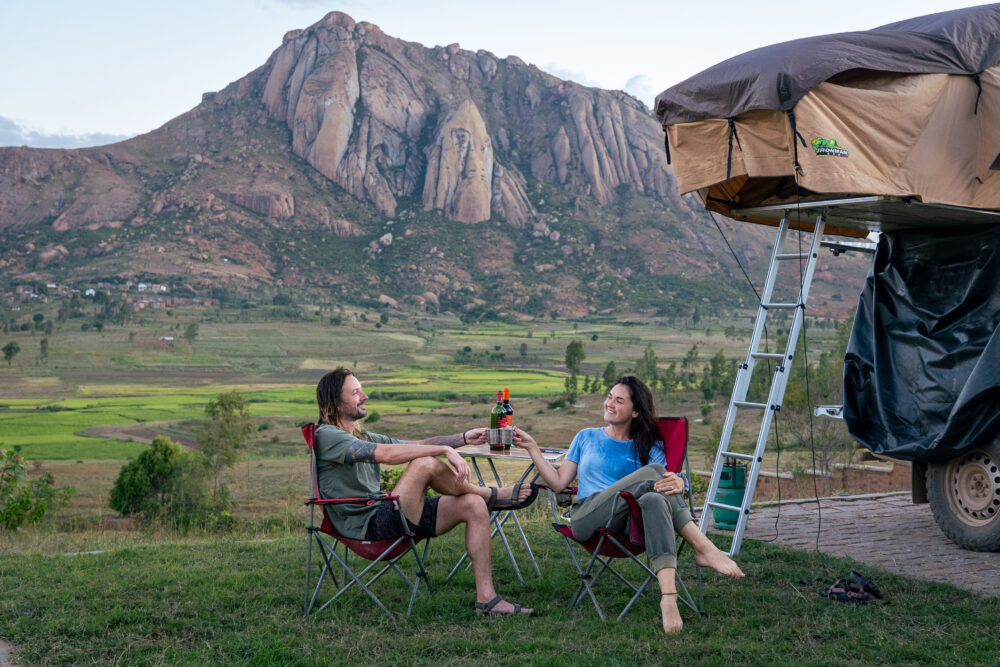
You can add a rooftop tent and save loads on accommodation throughout the country. We found the areas around the RN7 to be the most conducive for camping.
On this budget-friendly Madagascar road trip itinerary, you are free to utilize ANY of their fleet as you won’t be venturing on the “restricted” orange or blue roadways pictured here. They also allow for one-way rentals that would work well for this itinerary with a pick-up in Tana and drop-off in Tulear.

Is Camping More Cost-Effective?
Definitely. And for this itinerary, I 100% recommend it.
If you’re looking for the most budget-friendly Madagascar road trip option, ground camping with the included tent is your best bet. Road Trip Africa throws in some mats as well, so it’s more comfortable than you would think.
Most hotels charge something to allow you to camp on their property. But even if you relied on this option every night and didn’t wild camp in Madagascar even once, you’ll still save money.
Decent hotels in each of these towns and national parks cost $30 to $50 a night. Many are much more than that, but let’s assume you take the cheaper options. At a minimum, you’ll spend $350 on lodging alone. The typical camp fee for hotels ranges from $2.50-$10 per night + the rooftop tent fee of $20/day *if* you go that route.
This means that camping will save you a minimum of $50, but in reality, we saved about $150 by wild camping and choosing scenic, affordable sites wherever we could.
The camping locations we recommend on the RN7 are also some of the most scenic in Madagascar. The same cannot be said about the budget hotels.
More Interested In Motorcycle Travel?
Cars are not the only way to road trip in Madagascar. You can rent geared motorcycles in Madagascar and follow the one-way route on this itinerary for about $30-60 per day. The only issue with this is the gear. Unless you have super compact camping and travel gear, you will have to rely on hotels for the duration of your visit.
Mada Liberte is a reputable company worth looking into.
Because of the roads in Madagascar this is not a good place to learn to drive a moto and some previous experience is highly recommended.
Best Time of Year For This Budget-Friendly Madagascar Road Trip
Madagascar has a violent cyclone season that you should avoid from December through March.
But other than that, THIS particular itinerary can be driven at any time of year. The RN7 is a paved roadway and if you follow this step-by-step guide you’ll rarely be deviating from it.
In my personal opinion, April/May is the best month to plan your travels. I enjoyed the low crowds of shoulder season, lush green landscapes following the rain, and cooler hiking climates in the high elevations.
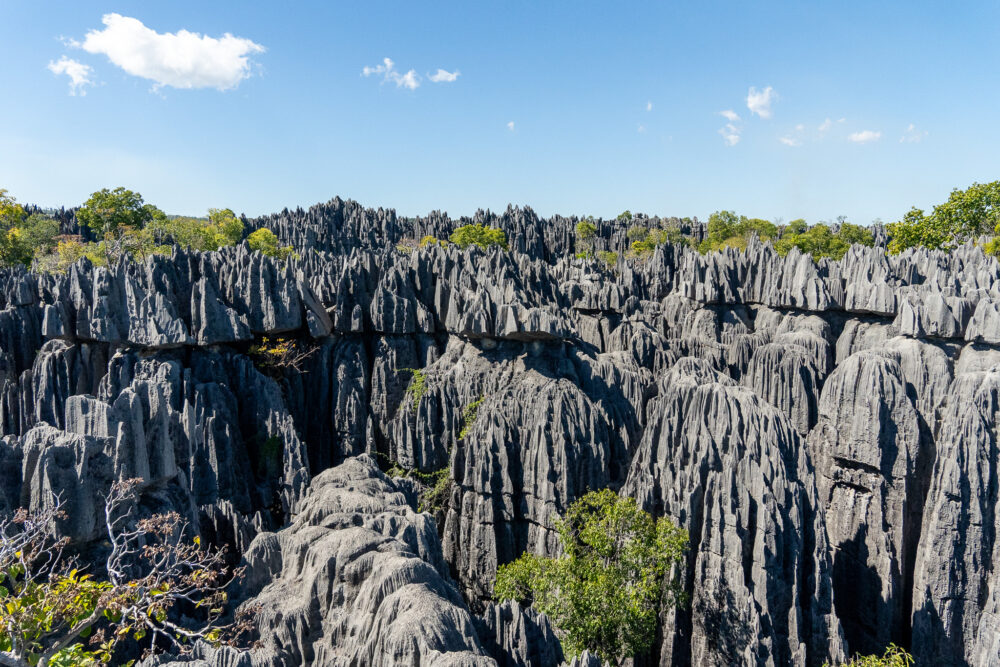
If you’re interested in a more adventurous itinerary with some off-road sections (that includes Tsingy de Bemahara National Park), you should bop on over to my 22-Day Madagascar Road Trip. *******
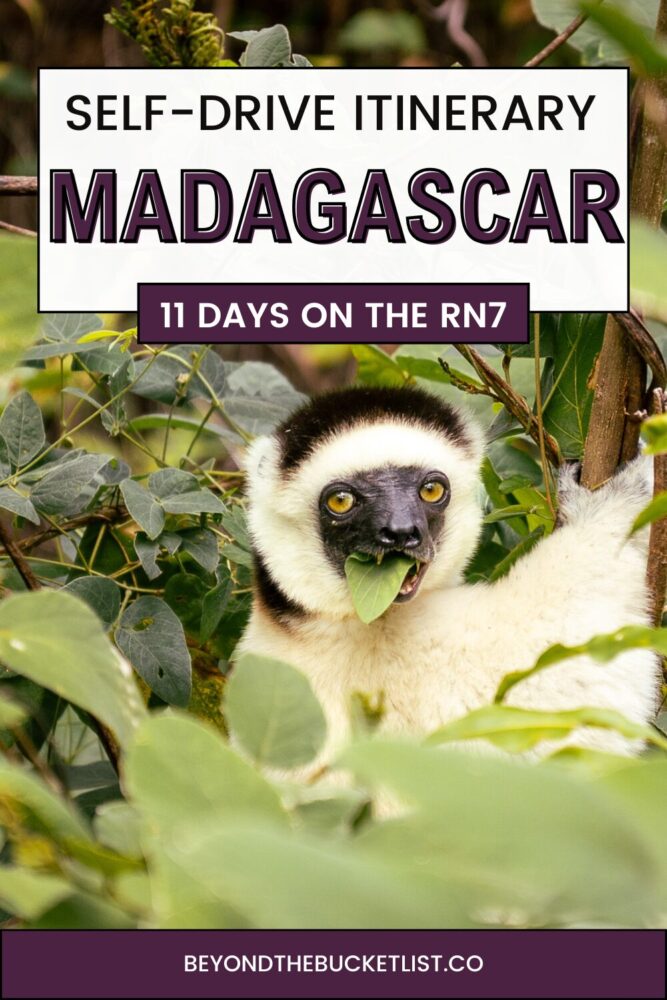
11-Day Budget-Friendly Madagascar Road Trip: Highlights of the RN7
Without further ado, let’s sink into the details of this budget-conscious Madagascar road trip.
Pre-Road Trip: Antananarivo/Ivato
Madagascar’s capital, Tana, gets a lot of hate—and honestly, I get it. I didn’t love it either, but spending a day or two there to get settled isn’t the worst thing in the world.
That said, I actually didn’t stay right in the heart of Tana. I stayed in a village called Ivato, closer to the airport, and I’d definitely recommend doing the same—especially if you’re planning to rent a 4×4. The traffic in Tana is brutal. I’m talking full-on gridlock where it can take 30 to 45 minutes to go just one kilometer during rush hour.
There’s also not a ton to see or do in the city itself, so it’s not really worth the hassle. Another thing to keep in mind if you’re driving yourself: the streets are super narrow—like, fold-in-your-side-mirrors-and-pray narrow. Ivato’s a bit better, but still, I’d recommend picking up your rental from the Road Trip Africa office rather than having it dropped at your hotel. Trying to navigate those tight streets in a vehicle you’re not used to is just asking for stress.
Where to Stay in Tana: Tianay Residence
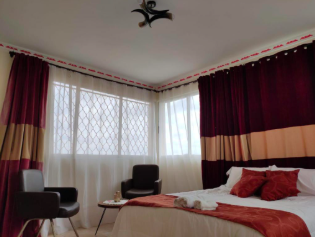
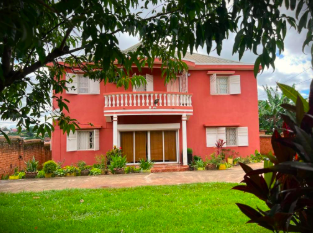
Where do I even start with Tianay Residence? The rooms were super comfy and spotless, the shower was nice and hot, and the host was incredibly kind. We got delicious home-cooked dinners every night, plus cold beers delivered right to us—all for a really reasonable price. And the best part? The family running the place donates their profits to help educate local kids. Honestly, this was one of our favorite spots in all of Madagascar.
It’s also in a great location—just 15 to 20 minutes from the international airport. You’re close to banks, a supermarket, and a few of the more reliable SIM card providers too. Super convenient.
Day 1: Tana to Andasibe National Park
- Real Life Drive Time: 3 hours, 170 KM
- Road Conditions: Follow the smooth tarmac of the RN2 out of the capital city. This is an excellent introduction to the roads of Madagascar.
Let’s hit the road!
You’ll want to grab the car nice and early so that you can hit the Carrefour in Tana to get supplies for the duration of the trip. While you will be able to re-up on fresh fruit and vegetables throughout the country, I would plan to get ALL your staples here in Tana.
We got rice, pasta, pasta sauce, couscous, beans, canned fruits, canned veg, easy instant meals, lots of French wine (highly recommend this), oatmeal, eggs, potatoes, and other staples. We also bought dish soap, paper towels, two small hand towels, a sponge, trash bags, and baby wipes because we know that is super helpful when it comes to clean up.
While the drive to Andasibe is short, you’ll lose more time than you think in Tana getting supplies. This is why we’re starting off with an easy test-drive day.
Where to Stay in Andasibe
The Mitsinjo Reserve parking lot has one small area for car-camping. It costs only 10,000 MGA per night ($2.50). While in daylight it’s not the most scenic spot, you are immersed in the rainforest and it’s likely you’ll see lemurs and chameleons straight from your campsite at dusk.
This is one of my favorite national parks in Madagascar, so we’re starting off with a bang.
Day 2: Morning Hike in Andasibe National Park/Back to Tana
- Iconic Wildlife to Spot: Indri, Diademed Sifaka, Greater Dwarf Lemur, Goodman’s Mouse Lemur, Eastern Lesser Bamboo Lemur, Ruffed Lemur, and more!
- Must-Do Treks: Mitsinjo Reserve morning trek (2-3 hours), Mitsinjo Reserve night walk
This awesome little corner of lemur territory is actually made up of three different parks: Andasibe, Mantadia, and Mitsinjo. If you’re choosing between them, I highly recommend prioritizing Mitsinjo over the more touristy Andasibe. It’s your best shot at seeing the famous Indri lemurs—and fun fact: a lot of the Madagascar scenes in Planet Earth II were filmed right here.
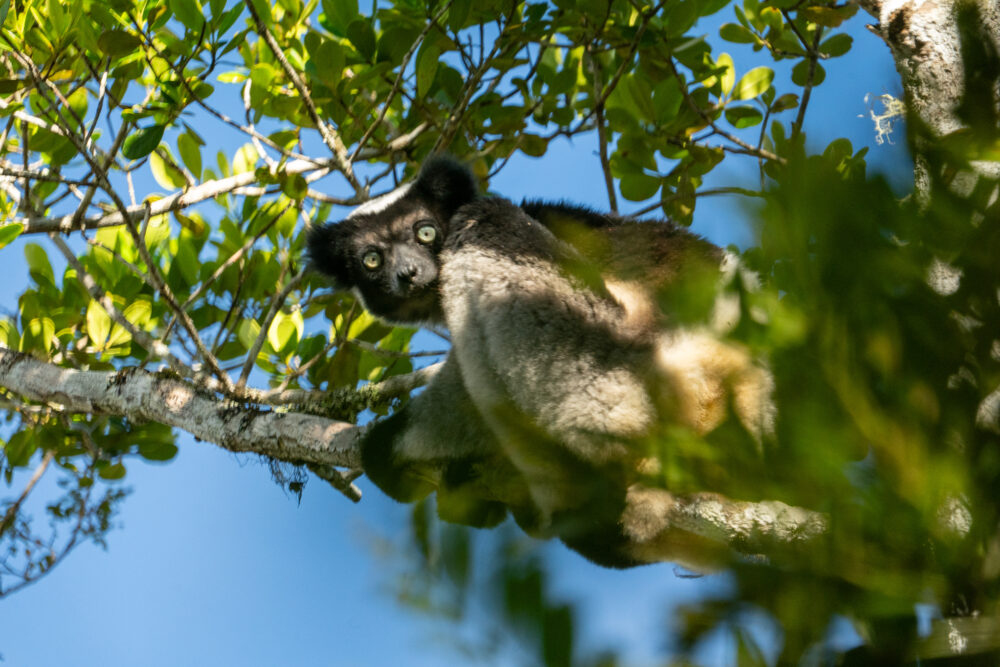
Mitsinjo is actually the only place on the planet where you can hear the Indri’s bizarre, whale-like calls echoing through the forest. These guys are the largest lemurs in Madagascar, and honestly, the most fascinating ones we saw. There are only about 400 of them left in the wild, and they’re a big part of Malagasy folklore—super beloved by locals and visitors alike. Sadly, their numbers have dropped fast due to deforestation wiping out their habitat, which makes places like Mitsinjo all the more important.
Another unexpected benefit? Mitsinjo is cheaper than Andasibe! The park entrance fee + guide fee for a morning Indri trek is only 120,000 for the 2-3 hour trek.
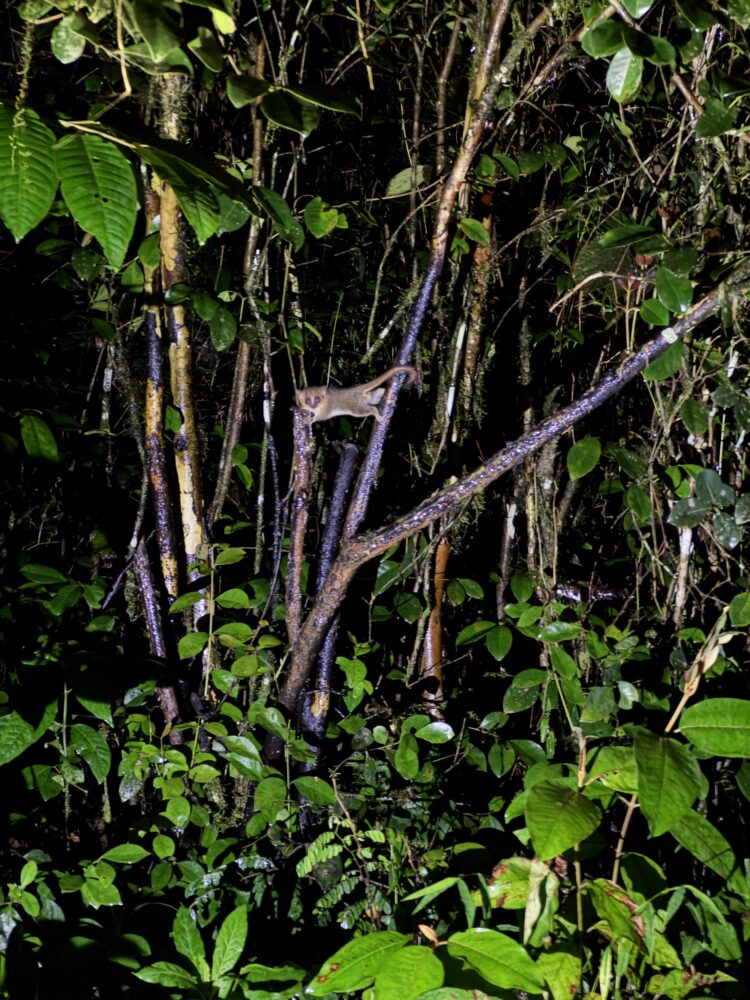
Night Walks in Andasibe National Park Area
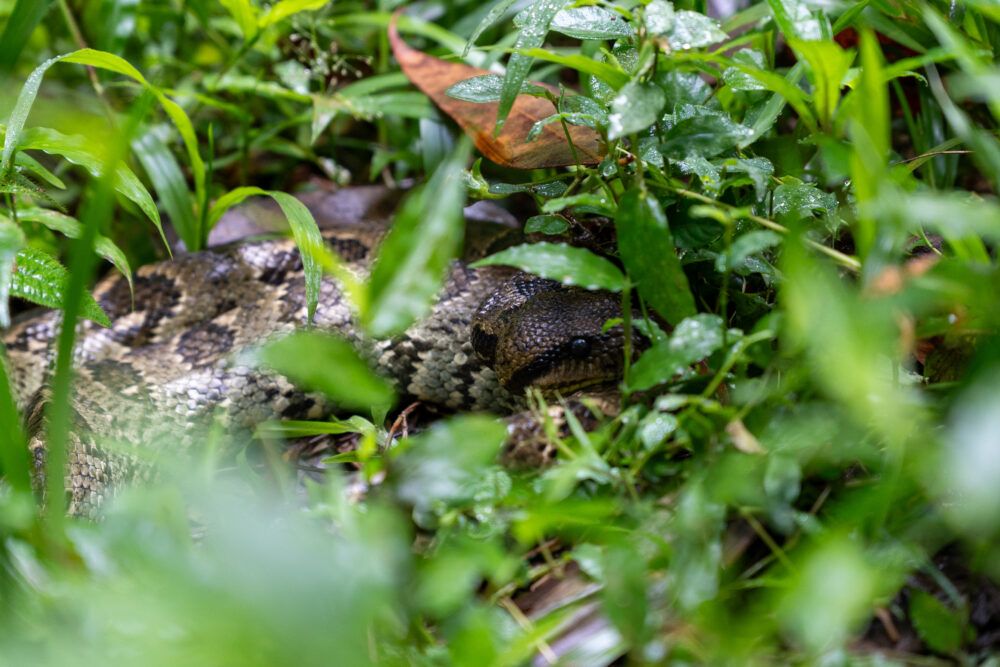
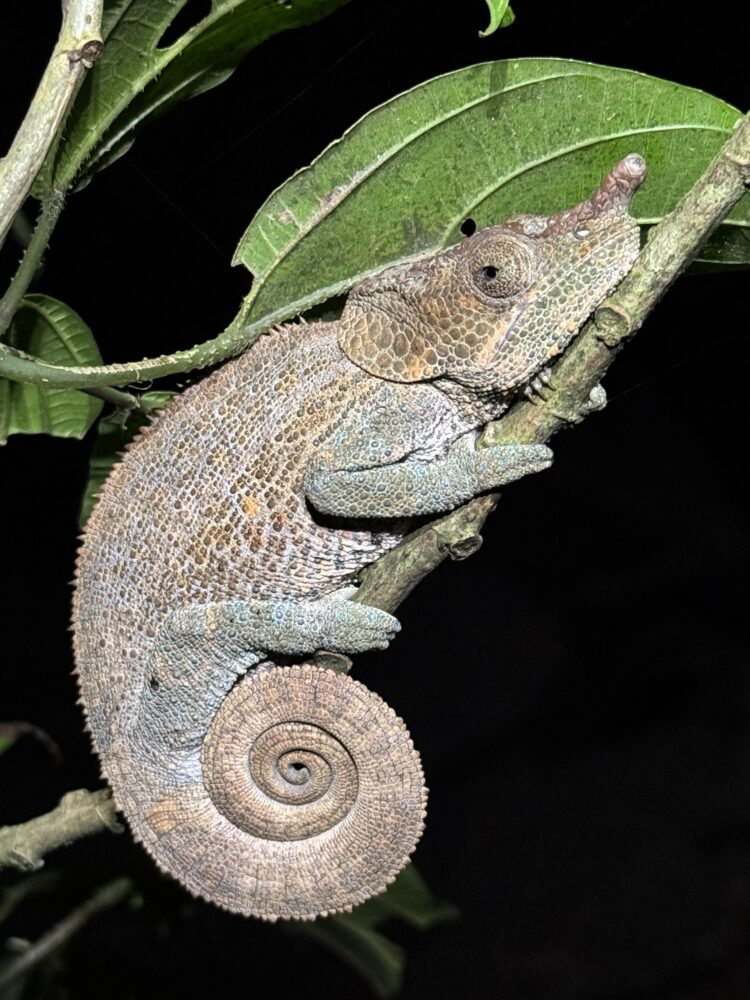
Mitsinjo is also where the night walk starts, and you have a chance to see the sportive lemurs as well as dwarf lemurs and mouse lemurs alongside Tree Boas, Chameleons, and more. In my personal opinion, this is my favorite of Madagascar’s night walk destinations.
If you’re going to do a night walk somewhere, let it be here.
Quick Andasibe Parks Comparison
What exactly is the difference between Andasibe, Mitsinjo, and Mantadia?
Andasibe is a solid pick for folks who aren’t looking to tackle anything too intense—the trails are more gentle and easygoing, which makes it popular with older travelers or anyone who prefers a less demanding hike. On the flip side, Mantadia is for the adventurous types with an extra full day to spare. It’s all primary rainforest, super rugged, and a lot more challenging (this one’s at the top of my list for next time).

That said, while Mantadia sounds epic, the trails are no joke, wildlife sightings are a bit more hit-or-miss, and any hike there will take 8+ hours. So, if you’re aiming to do Mantadia right, plan for at least two full days in the area. Mitsinjo is the happy medium and my personal pick for those short on time.
Afternoon Drive to Tana
While it would be wonderful to stay for a second night in the Andasibe area and take advantage of an afternoon walk in Andasibe Reserve, we’re on a tight time schedule with the car rental. If you don’t make it back to Tana this afternoon, your drive tomorrow will be incredibly long—like 10 hours and 400 km long.
If you have an extra day, I would add it here so that you don’t feel too rushed when you start out.
Day 3: Tana to Antsirabe
- Real Life Drive Time: 7 hours, 185 KM
- Road Conditions: Today’s journey will be on a very busy stretch of the RN7. Expect tarmac but plenty of potholes that will make the journey slow.
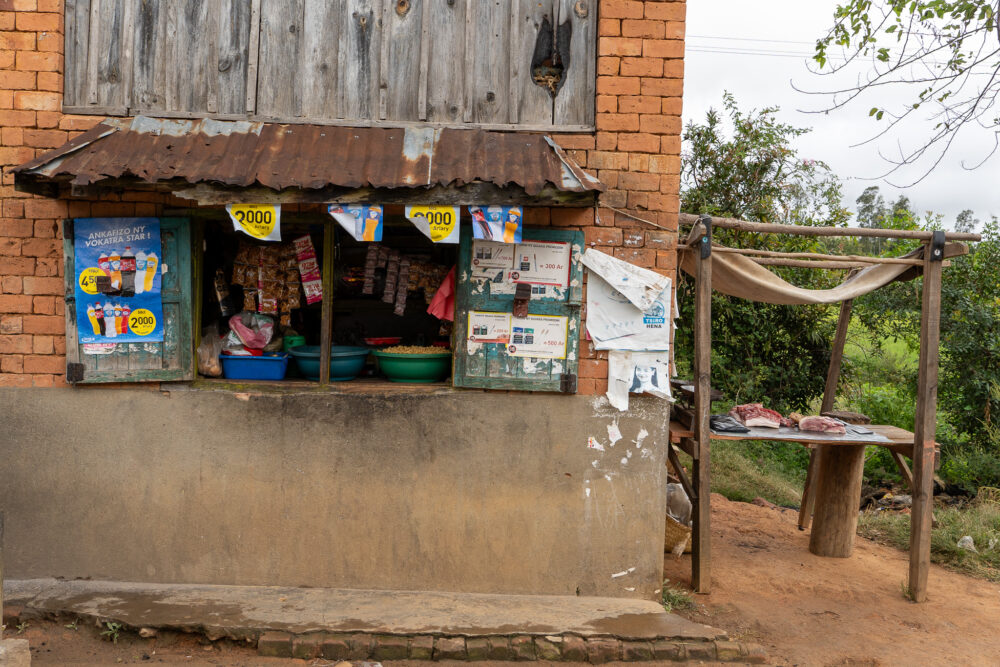
Today is little more than a drive day. The scenery will be beautiful, and you’ll probably want to give yourself ample time to snap some photos and explore the many roadside vendors selling unique handcrafted goods along the way. You can find rugs, metal works, and more as you approach the town of Antsirabe today.
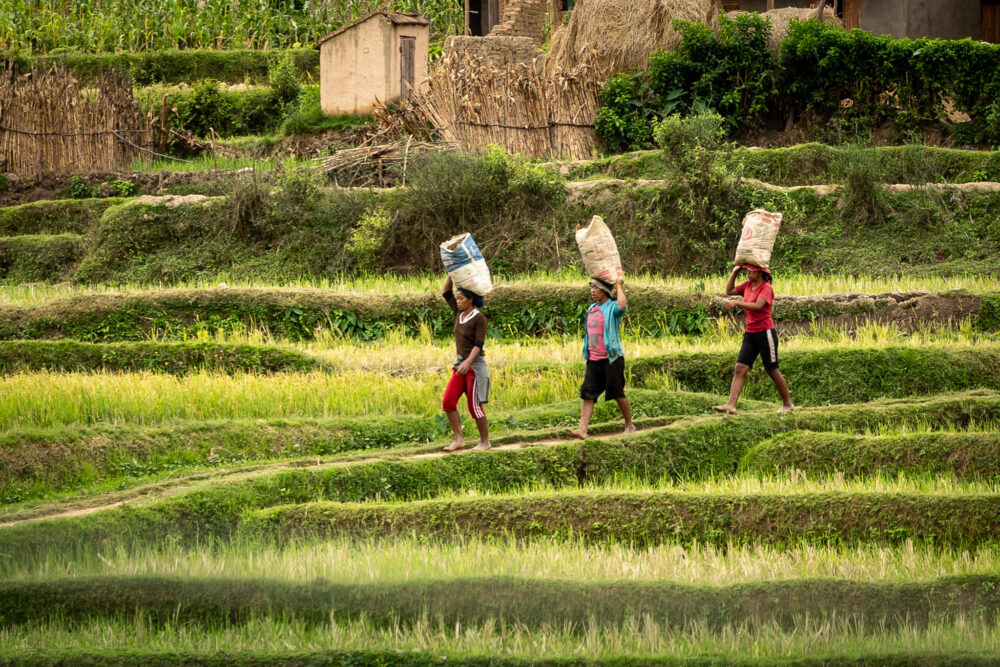
These stalls are a great way to buy unique hand-crafted goods, unlike in tourist towns.
If you find yourself in Antsirabe looking for food, Chez Jenny is highly recommended. Before you reach Antsirabe, there is a small town called Ambatolampy with a lovely restaurant serving delicious duck breast (and frog legs) called La Pineta. If you’re going to make a scheduled stop for lunch…let it be here!
Where to Stay in Antsirabe
Residence Madalief is a great little camping spot/hotel just south of Antsirabe. The only thing to keep in mind is that you definitely want to call ahead to let them know you’re coming. We didn’t—and when we rolled up just after dark, the gate was shut tight. Luckily, after a few honks and some waiting, someone came out and let us in, but it was a bit of a close call.
Camping there runs about 40,000 MGA (around $8.90), and they’ll open up a room so you can take a proper shower, which is a nice bonus. This area will be difficult to wild camp as it’s relatively populated.
Day 4: Antsirabe to Ranomafana National Park
- Real Life Drive Time: 7-8 hours, 245 KM
- Road Conditions: Continue on the RN7 with slightly fewer trucks and traffic than yesterday. Potholes are more numerous, and the road is very windy. The final 30 KM has some huge cratered potholes, but overall it’s still tarmac and not bad if you follow the directions below.
- Important Directions: Stay on the RN7 until Alakamisy Ambohimaha. Here you’ll take the RN45 to your destination. Google will try to tell you to take the RN25. This is a horrible, awful road that you’ll probably get stuck on, or at the very least will take you 10x as long as the RN45.
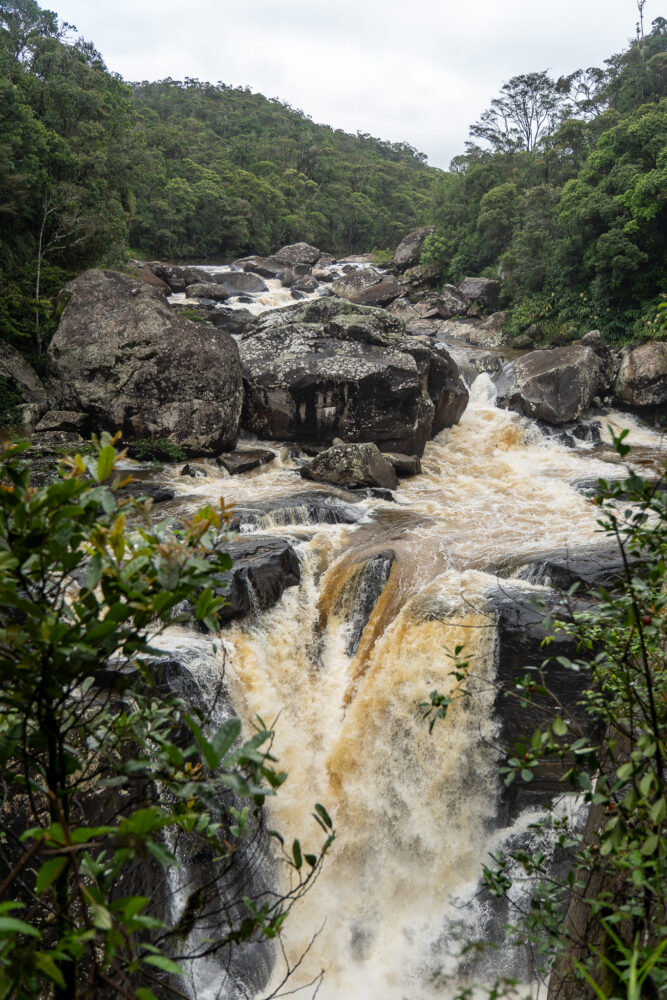
The roadside views just keep getting better today! As you get closer to your first big stop—Ranomafana National Park—you’ll start to see the landscape shift into lush rainforest. It’s seriously beautiful. Just a heads-up though: this is going to be a long day of driving. The roads are super windy, so take it slow and enjoy the ride.

Where to Stay in Ranomafana National Park
There are a couple of solid spots for rooftop tent camping around here. The more budget-friendly option is right at the park entrance (Rianala Gate), where car campers can park and set up in the sandy area near the trailheads. It’s super cheap—just 10,000 MGA (about $2.50) for the night. The catch? It gets really busy in the morning. So if you’re hoping to chill out or make breakfast at camp, be ready for crowds of vendors and park visitors swarming the area.
Personally, I preferred the lot across from Setam Lodge. It’s a bit more expensive at 40,000 MGA (around $10), and it’s closer to the road, but it’s way more peaceful and has a nice view of the jungle—definitely worth the extra cost if you’re after a quieter, more scenic spot.
In an ideal world, you should stay at the Setam Lodge lot the second night so you can have a slower morning before you hit the road. The first morning, you’ll be hiking early, so it doesn’t really matter.
Day 5: Ranomafana National Park
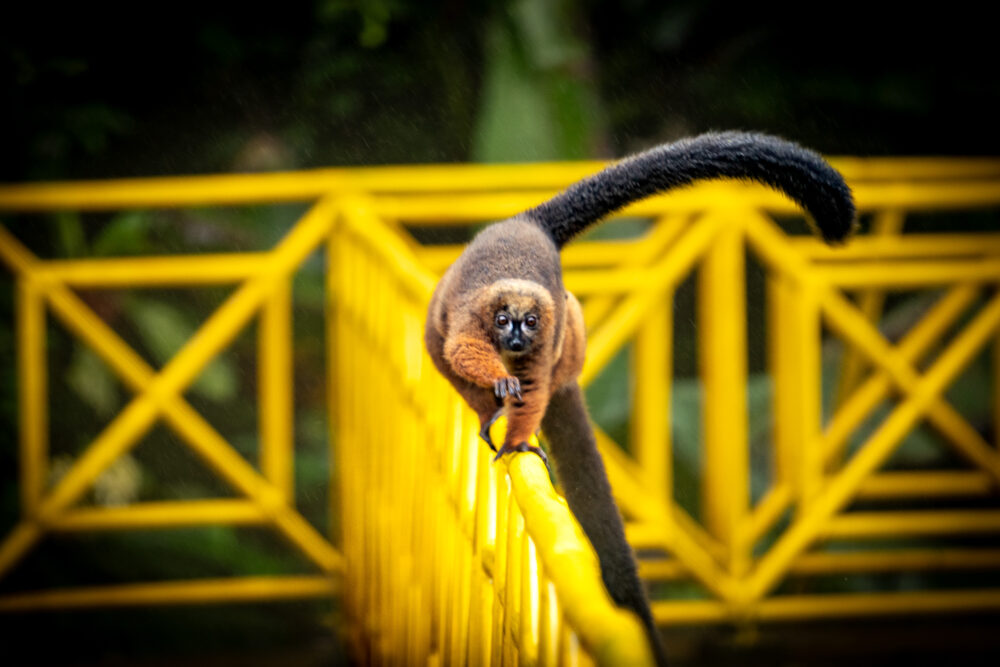
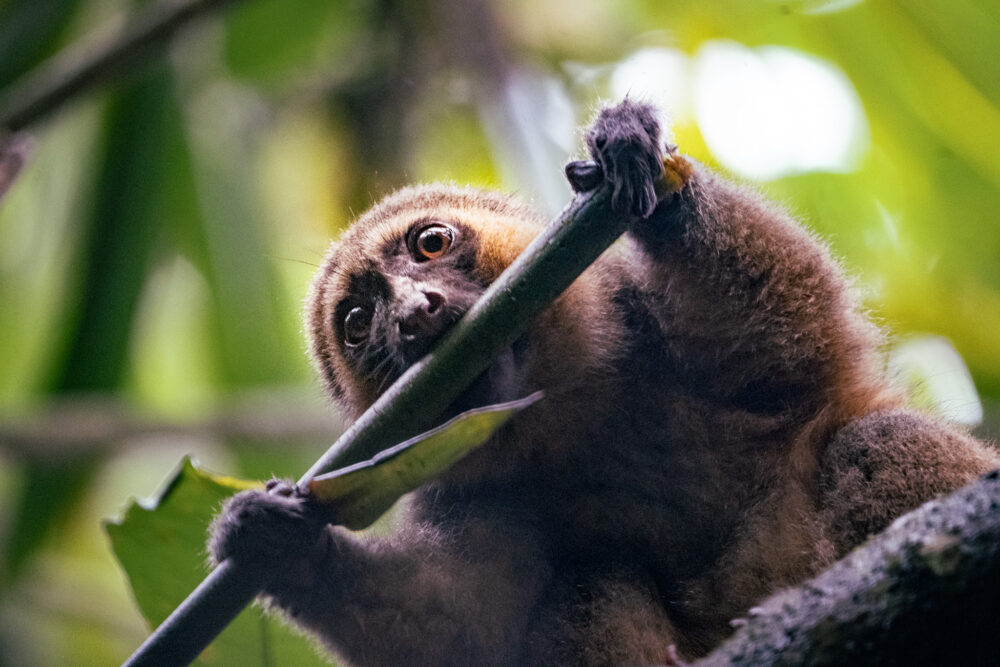
- Iconic Wildlife to Spot: Greater Bamboo Lemur, Golden Bamboo Lemur, Rufous Mouse Lemur (nocturnal), Milne-Edwards’s Sifaka, Red Fronted Brown Lemur, and more!
- Must-Do Treks: Night walk + 3-4 hour morning trek.
It was absolutely pouring the day we visited Ranomafana (it is a rainforest, after all), so we weren’t exactly in the mood to jump into the longest hike right away. We ended up going with the 3-hour trek early in the morning, which turned out to be a solid choice. All the trails pass through the secondary forest and into the bamboo forest, and you’ve got a pretty decent chance of spotting a few lemurs along the way.

After a successful morning and some solid lemur sightings, we cooked up a quick lunch and decided to head back out for another hike in the afternoon. Honestly, I wouldn’t recommend doubling up on hikes like we did unless you’re really hoping to see a specific species. We were on a mission—and by the end of that second 3-hour trek, we were totally wiped. We just made it back in time to squeeze in the night walk.
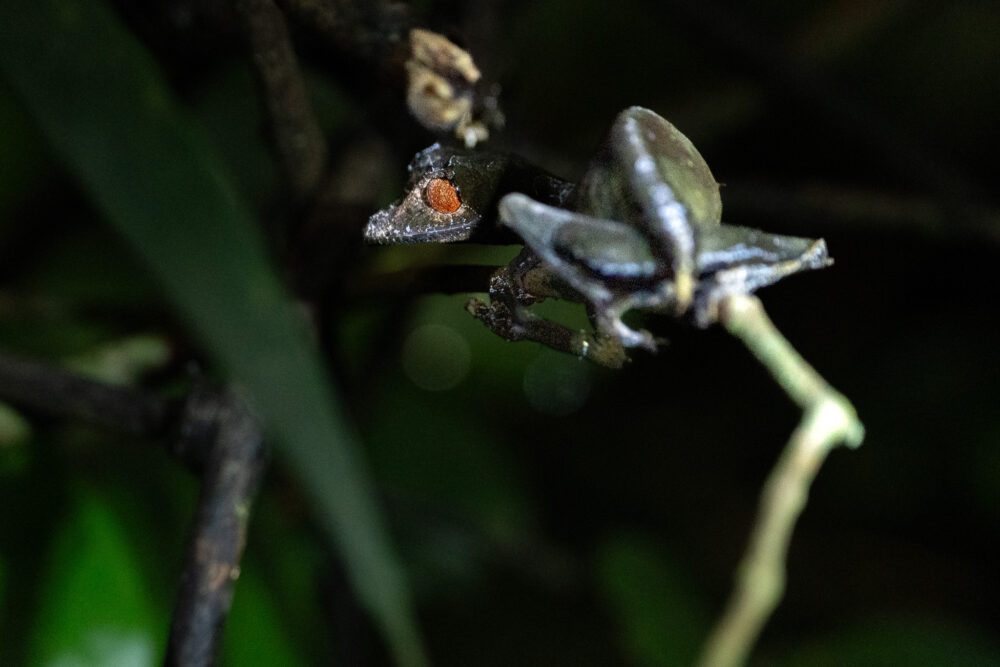
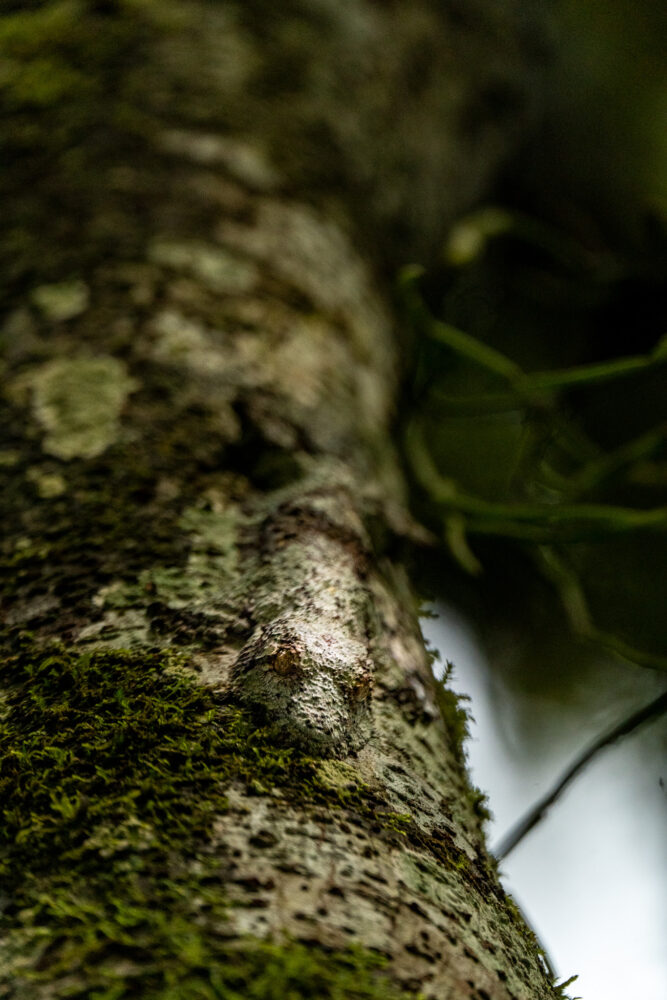
That said, the payoff was worth it. We saw Greater Bamboo Lemur, Golden Bamboo Lemur, Milne-Edwards’s Sifaka, Red Fronted Brown Lemur, Common Brown Lemur, Satanic Leaf Gecko, Mossy Leaf Gecko, and a bunch of cool chameleons.
As for the hiking itself—Ranomafana is somewhere in the moderate zone. Lots of rolling hills and ups and downs, so keep that in mind when picking your trail length.
Weather in Ranomafana
This is a rainforest. Please remember to bring layers (including waterproof ones) for all treks and camping in this part of Madagascar.
Should You Do The Night Walk?
Night walks in Madagascar are pretty rare, with just a few spots offering them—Ranomafana, Andasibe National Park, and Kirindy Reserve. Just a heads-up, you won’t be hiking inside the parks themselves, but rather on trails in nearby reserves or forest edges.
Andasibe is my personal favorite because you actually get to wander through a real forest at night. Ranomafana’s night walk is right along the road, which isn’t ideal since cars keep passing and you have to step aside, but the wildlife there is still really impressive.
One big downside: if you visit during peak season (June to August), you might find yourself stuck in a crowd of 200 people in a tiny space, which can take away from the experience.
Day 6: Ranomafana National Park to Anja Community Reserve
- Real Life Drive Time: 5 hours, 130 KM (+ 1.5 hours for Anja Reserve)
- Road Conditions: Paved road on the RN7 for the entire journey. You pass through several larger towns/cities on this section, which makes it slower driving than usual due to traffic.
- Must Do Trek: 1.5-hour walk at Anja Community Reserve
We had originally planned to drive straight to Camp Catta in Andringitra National Reserve on this day, but honestly, unless you leave at sunrise and skip visiting Anja Community Reserve…it’s not feasible.
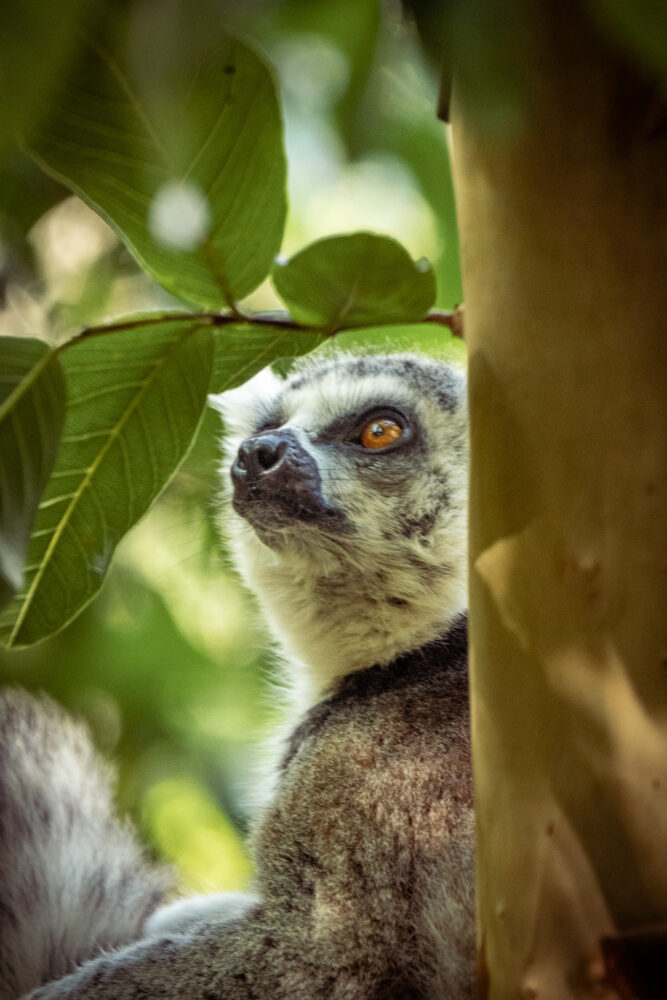
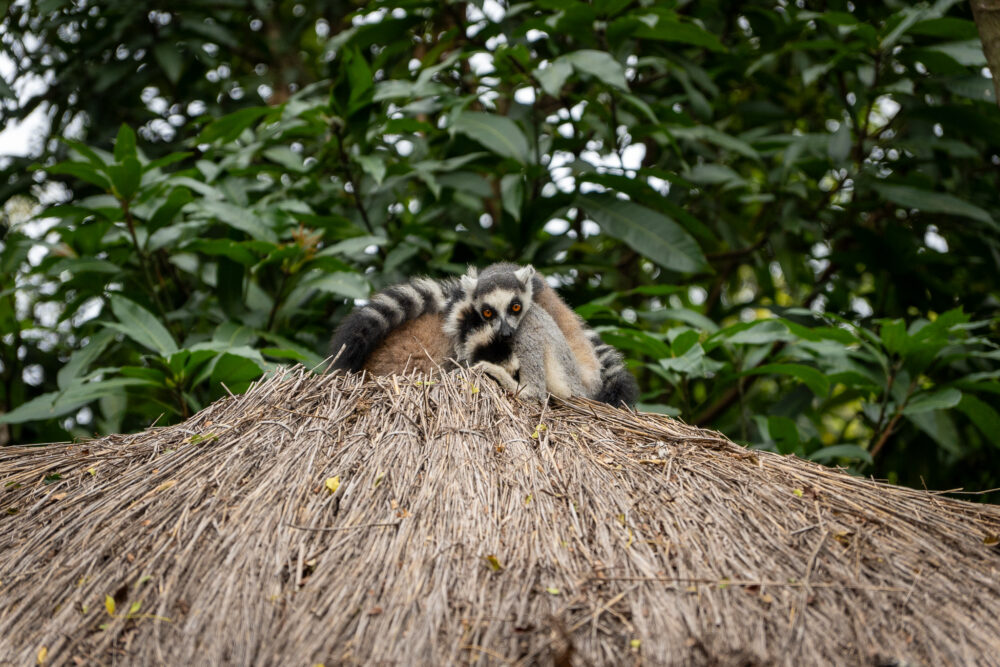
Anja Community Reserve has a few species of animals and offers short wildlife hikes ranging from 1-3 hours. The main reason to visit is the abundance of Ring-Tailed Lemurs. Yes, you’ll probably see them elsewhere in Madagascar, but these have been habituated and allow you to get really close. At one point, I was standing in the jungle surrounded by leaping ring-tails.

The best time to visit the reserve is in the early morning or afternoon, as the lemurs will be most active. If you’re following this itinerary, then the afternoon works best.
Quick Info About Anja Community Reserve. Be sure that you stop in at the TICKET office that has official signs on the cost of entry and treks. This is the only place in Madagascar where a guide tried to overcharge us. The park entrance plus a 1-ish hour trek should be 130,000 MGA or $40 for two people. We accidentally passed the
Where to Stay Near Anja Reserve
Option one is to stay in the Anja community area for cheap (around 40,000 MGA or $10). Option 2 is the Betsileo Lodge.
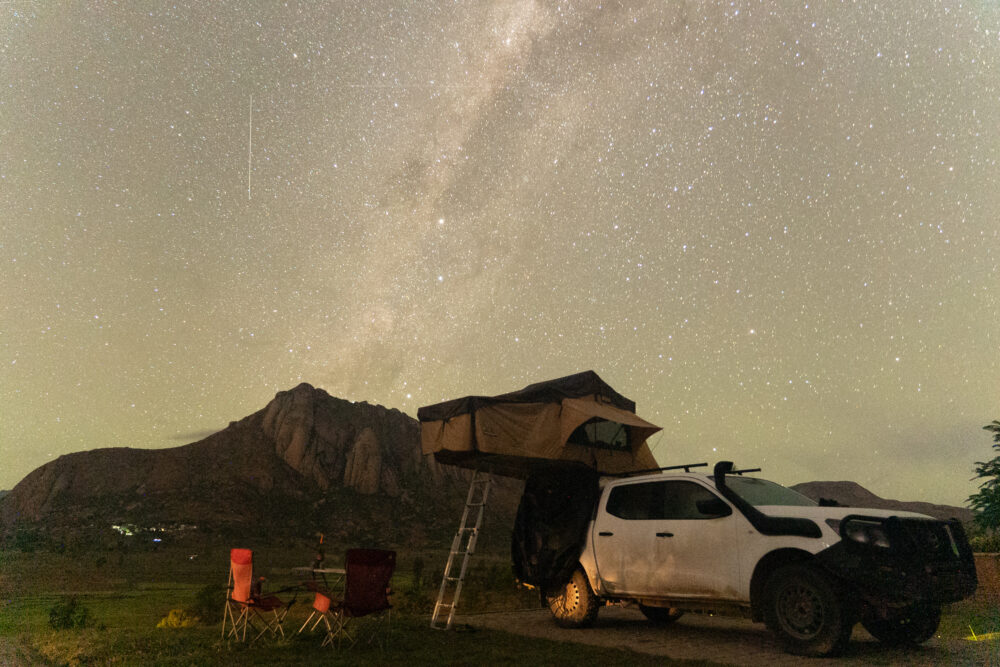
Betsileo Lodge was the most expensive campsite we paid for, at $30 or 100,000 MGA for the night. But it’s also one of the only campsites in all of Madagascar that had showers, a real bathroom, and a lovely camping setup for rooftop tents that overlooked an epic view perfect for night photography. There is also a pool and a restaurant available if you don’t feel like camp food. Rooms here were pricy, but the camping facilities were more than enough.
Day 7: Anja Community Reserve to Andringitra Reserve
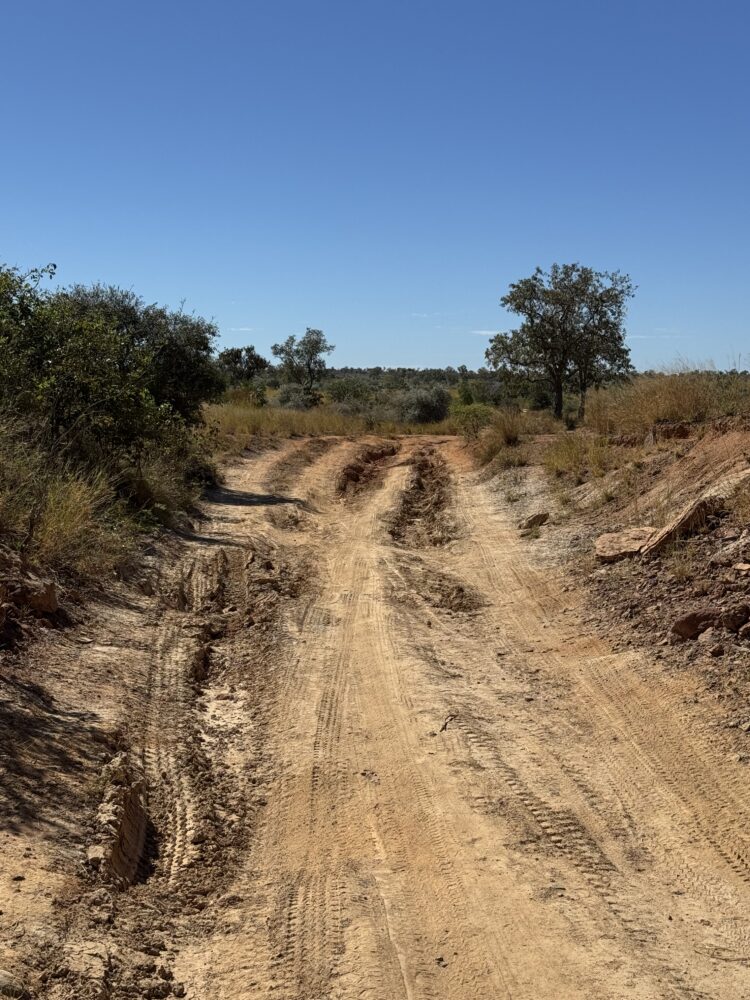
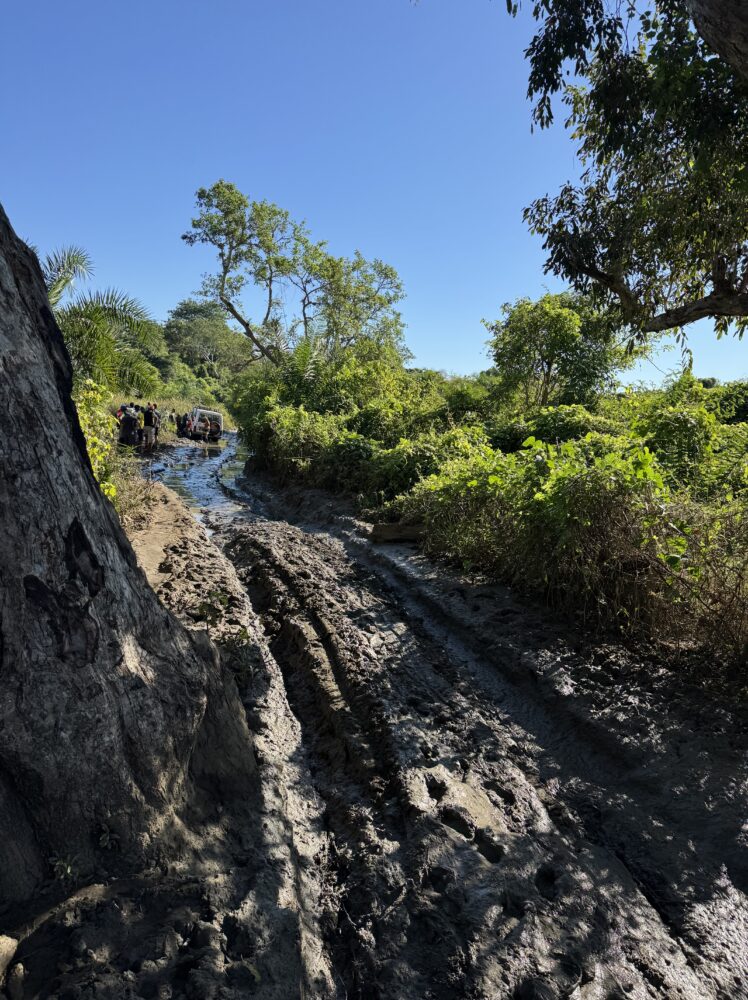
- Real Life Drive Time: 3.5 hours, 60 KM (30 on pavement, 30 on off-road)
- Road Conditions: The first part of the route is paved as you continue down the RN7. But at the town of Vidia, you’ll make a left turn off the pavement onto a dirt track to guide you toward the reserve. There will be a few portions of road (near the first town + community fee) that are tricky to drive but otherwise its a simple dirt road.
This is not a journey you want to make after dark.
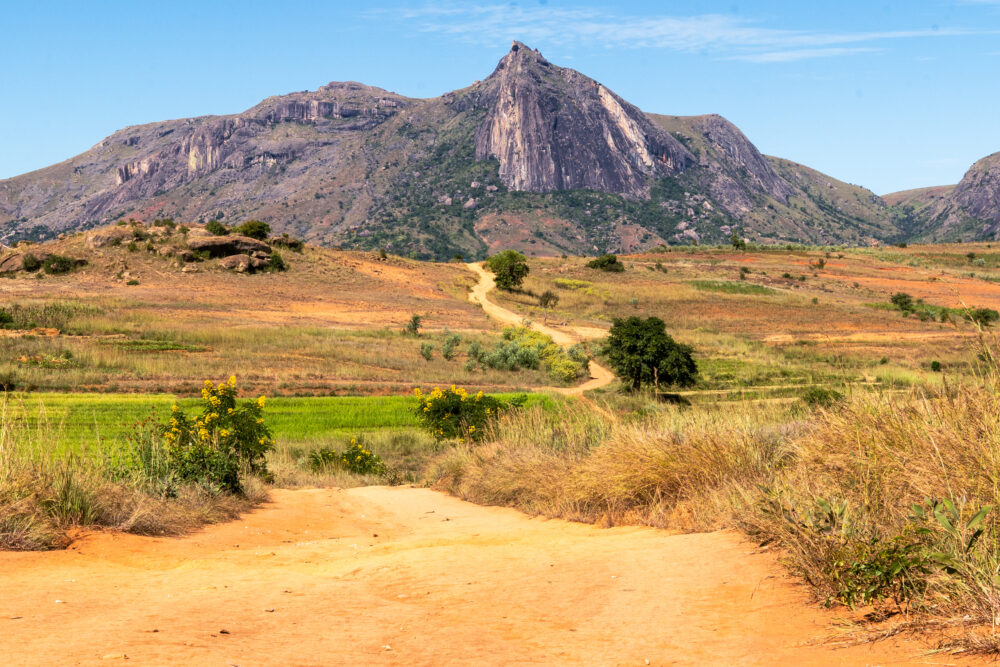
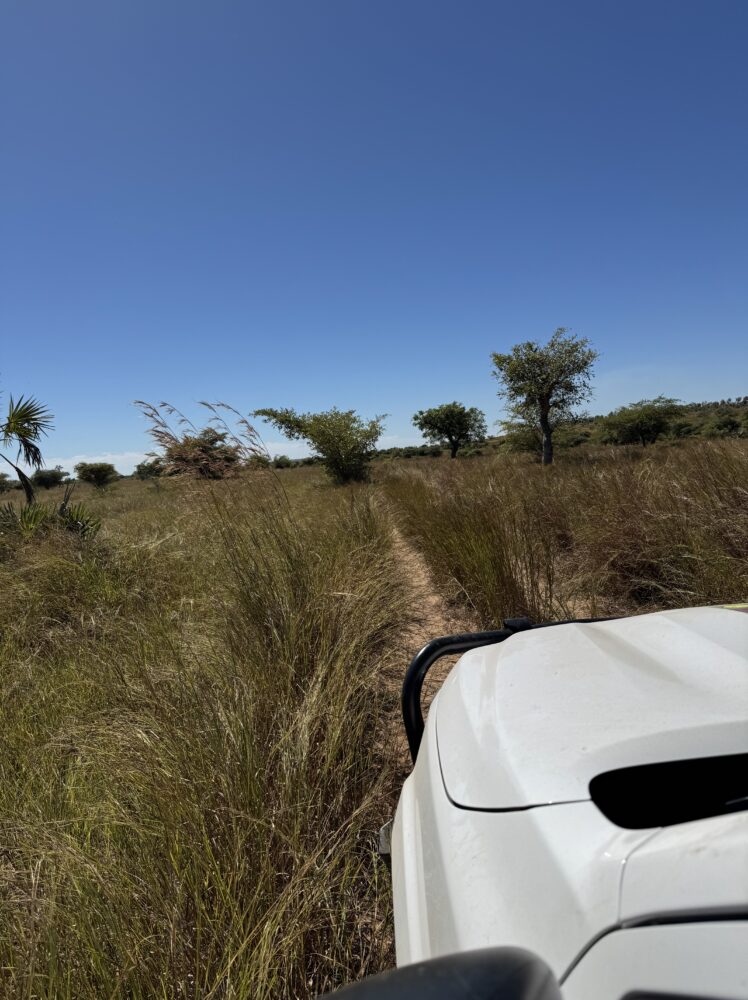
Reaching the reserve requires about 2.5 hours of slow, careful driving on off-road paths. This is easily navigable using an offline version of Maps.me, and you can even use Google Maps for the most part. Almost immediately, you’ll pass through a small town that asks for a 10,000 MGA or $2.50 community fee. Kids here will swarm your car looking for gifts and snacks, so be ready for it.
The first half of the off-road track was in much worse condition than the second half in 2025. If it’s been raining, this will be extremely difficult, and I would reconsider traveling to this region. If possible, Andringitra should not be missed. It’s the best park for views and hiking.
As you arrive at your destination, you’ll be approached by locals to collect the community fee. 20,000 MGA per person or about $6.
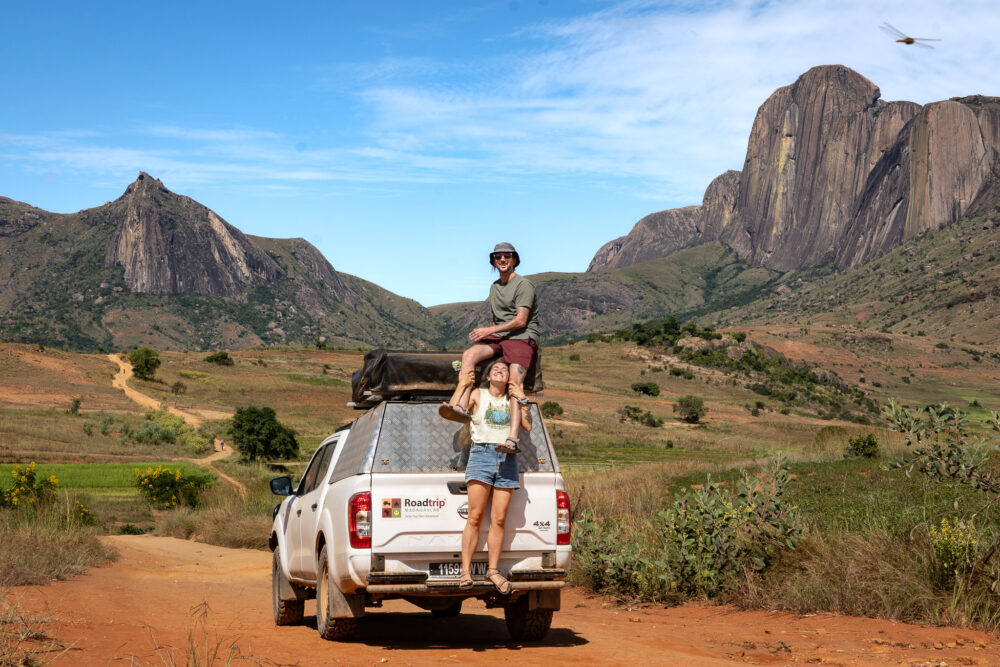
Where to Stay in Andringitra
Camp Catta is where it’s at. Whether you want to treat yourself to a glamping room or just pitch your tent at their stunning overlook, you really can’t go wrong with either choice.
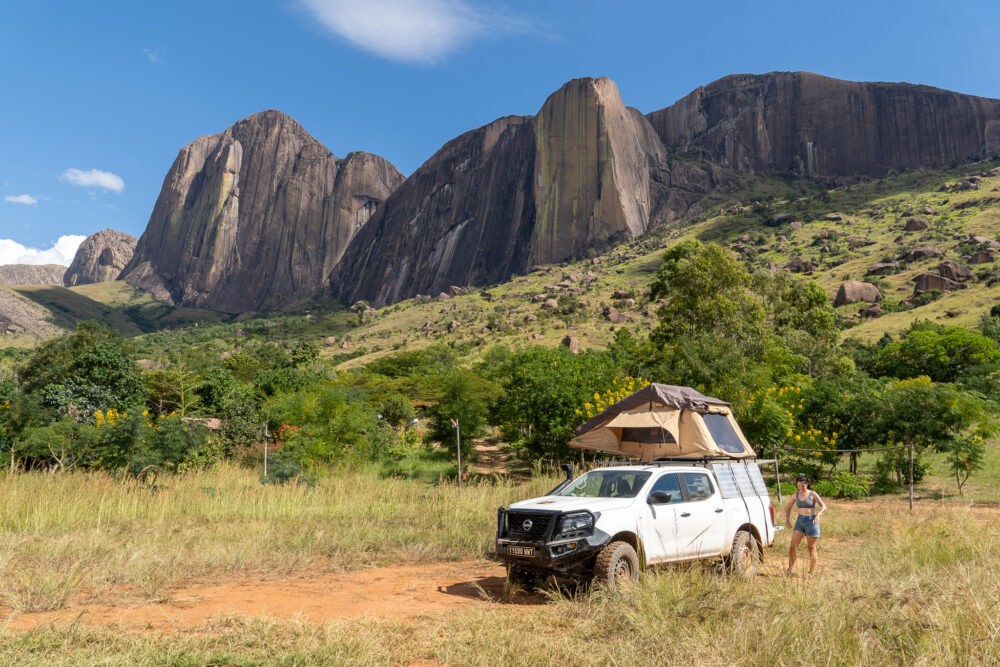
They’ve got a pool, a restaurant, laundry facilities, and some seriously amazing mountain views all around. Plus, it’s the starting point for a bunch of the best hikes in the area. Spend some time hanging out at the restaurant, and you’ll probably get some ring-tailed lemurs dropping in from the mountains, hoping for an easy snack. On this itinerary, this is the BEST place to spot ring-tailed lemurs.
This is another of our favorite campsites in Madagascar.
Day 8: Andringitra Reserve
- Iconic Wildlife to Spot: Ring-Tailed Lemurs, Chameleons, Tree Boa
If you have extra days to add to your itinerary, I would add them here. (And maybe one extra at the very beginning in Andasibe National Park as I mentioned)
There are loads of great hikes to choose from here, but some take more than a day or are pretty tough—especially after all the driving you’ve done. Here are the top three you should know about:
- Grand Circuit: This is a full-day hike (6-8 hours) with absolutely stunning views. It’s pretty challenging and even has a rope-assisted climb up to the summit. If you’ve got an extra day to recover, I’d definitely recommend this one. It’s not so much about how far you walk, but the elevation gain and exposed sections that make it tough.
- Chameleon Track: This is the must-do hike, no matter how much time you have in the park. You’ll get great views and a good chance to spot some wildlife. Aim to start in the morning and expect to spend 4-6 hours on the trail.
- Pic Boby: This one’s a real adventure—climbing the tallest peak in the region. It takes 2-3 days with porters and camping, so you’ll need to book ahead and have some extra days to spare. Everyone I met who did it loved the experience. Highly recommend if you can make the time.
You’ll pay depending on which trek you choose, and keep in mind you can’t enter the reserve without a guide.
Day 9: Andringitra Reserve to Isalo National Park (Ranohira)
- Real Life Drive Time: 6-7 hours, 220 KM
- Road Conditions: Start your day by backtracking 30 km off-road to reach the RN7 again. From here, it’s pavement until Ranohira town, your home base for Isalo.
We got an early start to make sure we had plenty of time to find a good campsite—super important in Ranohira. Honestly, the town itself is pretty rough and easily one of my least favorite spots in the whole country. That’s probably because it’s packed with tourists visiting Isalo National Park.
Once you get to town, head straight to the park office to book a guide. There’s usually a board outside listing all the guides and the languages they speak. Since all Isalo treks kick off early in the morning, it’s best to arrange your hike the day before. They’ll also offer you a BBQ lunch to go with your trek—it was way bigger and tastier than I expected, so definitely consider adding it on!
Where to Stay in Isalo
There are a few options for your Isalo stay.
Chez Alice is centrally located, a 5-min drive from where you’ll pick your guide up in the morning. They have the best restaurant in town (for reasonable prices) + camping is only 15,000 MGA or ~$4.50 BUT you aren’t allowed to cook here and the parking lot you set up in is far from scenic.
Isalo Ranch or Camping at a lodge in this region. I highly recommend asking one of these properties just beyond town center if you can camp here. It will probably cost around 40,000 MGA ($10), but the views and amenities are WAY nicer.
Wild Camping further south of town (near Isalo Window). The benefits are that this is totally free and BY FAR the most scenic option. I wish this is what we had done, but tired after a full day of driving, we didn’t bother to venture south of town on the RN7. The cons? Isalo is chilly as it is, so be sure to find a place that has a little wind barrier.
In-Park Camping Option: You could choose to camp at Namaza Campsite, about 1 KM up the trail inside Isalo National Park. You’ll probably see plenty of lemurs hanging around camp, which is a nice bonus. But since it’s a short hike in, you have to camp there—no other accommodations—and the sites are more developed, so it doesn’t feel super wild.
The other catch is that you’ll have to pay for a 2-day park pass if you go this route, which is an extra 55,000 MGA ($12) per person on top of a 10,000 MGA camping fee. Since we only planned to spend one day trekking in Isalo, we decided to skip this option.
Day 10: Isalo National Park
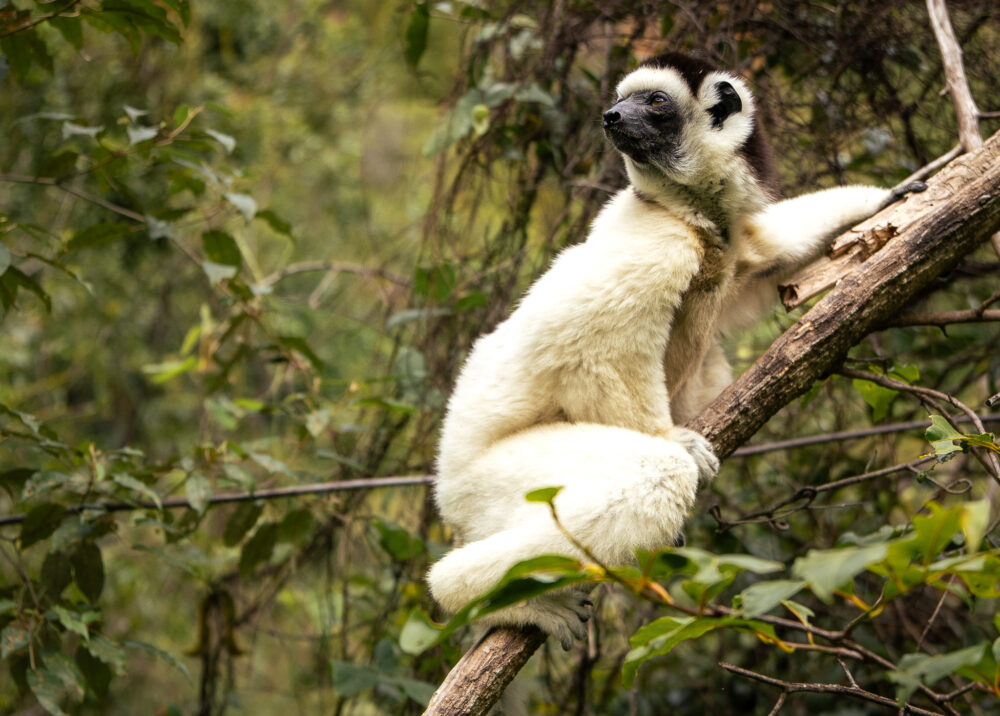
- Iconic Wildlife to Spot: Ring-Tail Lemur, Common Brown Lemur, Verreaux’s Sifakas, Scorpion, Chameleon
- Must-Do Treks: Black + Blue Pools Trek or Piscene Natural Trek.
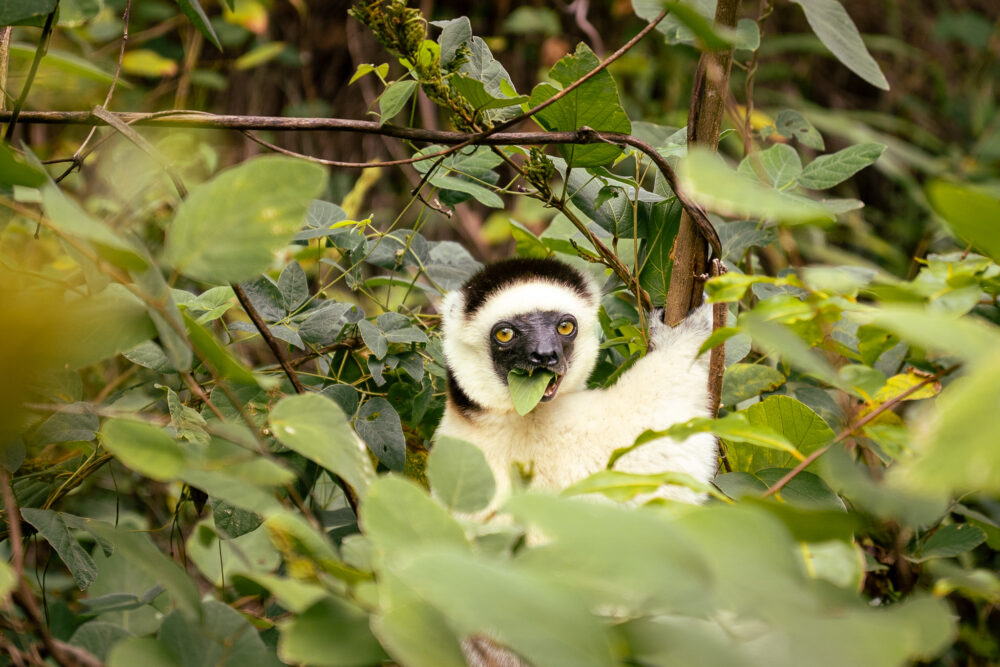
If you’ve only got one day in Isalo—which I think is plenty—most guides (and me!) will recommend the Black and Blue Pools trek. It’s a half-day hike that takes you through all the iconic Isalo landscapes and gives you the best shot at spotting the Verreaux’s Sifakas, which was definitely my favorite part of the park. Swimming in the natural pools is a nice little bonus, but honestly, it’s not the main event.
Keep in mind that you and your guide will have to drive to the trailhead on a rough dirt road in the early morning, so you’ll have to pack up camp. The drive takes about 20-30 minutes from town.
We made sure to linger with all wildlife and walk to the very edge of the lookout, taking lots of photos, which put us behind the other groups visiting the park by quite a bit. This is vital because you don’t want to end up at the pools at the SAME time as everyone else visiting the park. We got the place all to ourselves.
What We Skipped: The Isalo Window is one of those attractions that everyone says you “must-see,” but it gets crazy crowded at sunset. As we’re from the US and have been blessed with attractions like Bryce Canyon in Utah, we felt we could skip this one.
The landscapes here are beautiful, and it was definitely one of my favorite hikes in Madagascar. That said, I didn’t feel the need to spend extra time exploring the area. You’ll start (and finish) the hike at Namaza Campsite, where you can hang out with some habituated lemurs and enjoy a tasty Zebu (beef) BBQ if you went for the lunch option.
Weather in Isalo National Park
Isalo is a cold-weather region of Madagascar. We visited the park at the end of April, and it was quite chilly. I still took a dip in the natural pool, but be sure to bring a sweater for camping and the hikes.
This will be the coolest area on your budget-friendly Madagascar road trip.
Day 11: Isalo National Park to Ifaty
- Real Life Drive Time: 8-9 hours, 265 KM
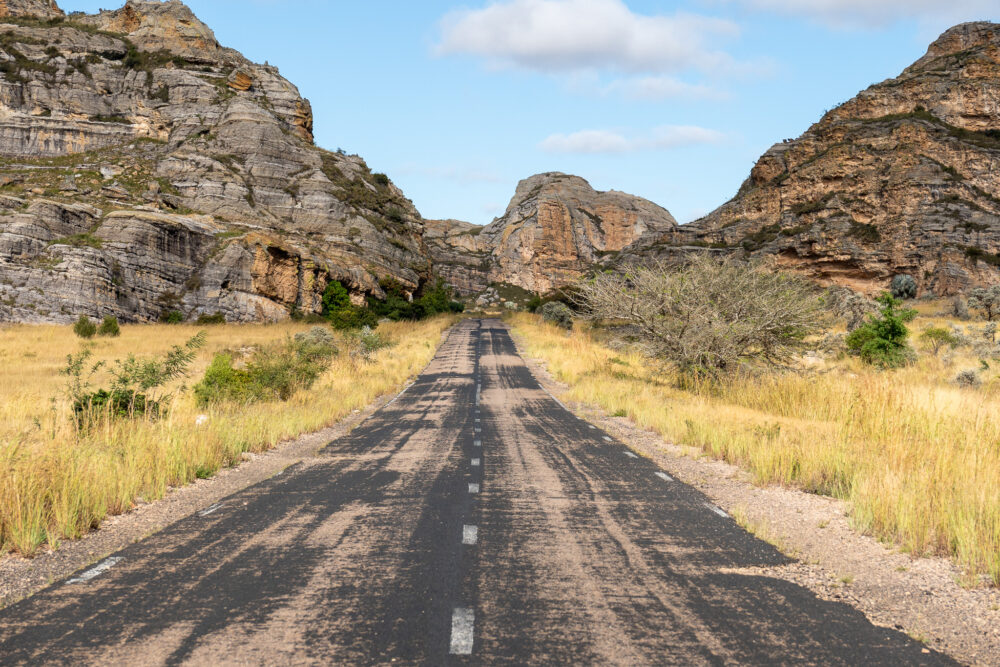
- Road Conditions: Your last day on the RN7, but “pavement” is a stretch here. It’s far more potholes than tarmac and one of the worst driving days in the country. Settle in, because this is going to be a slow one. Don’t worry though, for the first part out of Isalo, it’s nicely paved.
- Must Do Trek: 1.5 hour Zombitse-Vohibasia National Park
You’ll cruise through some seriously stunning scenery as you head from the highlands down to the coast. Be sure to leave Isalo early—like sunrise early—if you are planning to stop in at Zombitse-Vohibasia National Park.
Zombitse-Vohibasia National Park is one of the least visited parks in Madagascar, and yet, it’s right off the road. If you’re not planning on traveling on to Morondava, this is also the best spot to see the bulbous Baobab trees. Daytime visits to the park include dusty, warm walks through the flat terrain in search of lemurs and reptiles (including the nocturnal sportive lemur sleeping in its tree hole).
After stretching your legs at the park, you can continue your long journey to Ifaty.
I’d recommend staying in Ifaty over Tulear—Tulear was pretty disappointing and felt rough around the edges. Neither place is a perfect beach spot, but Ifaty definitely has a bit more charm.
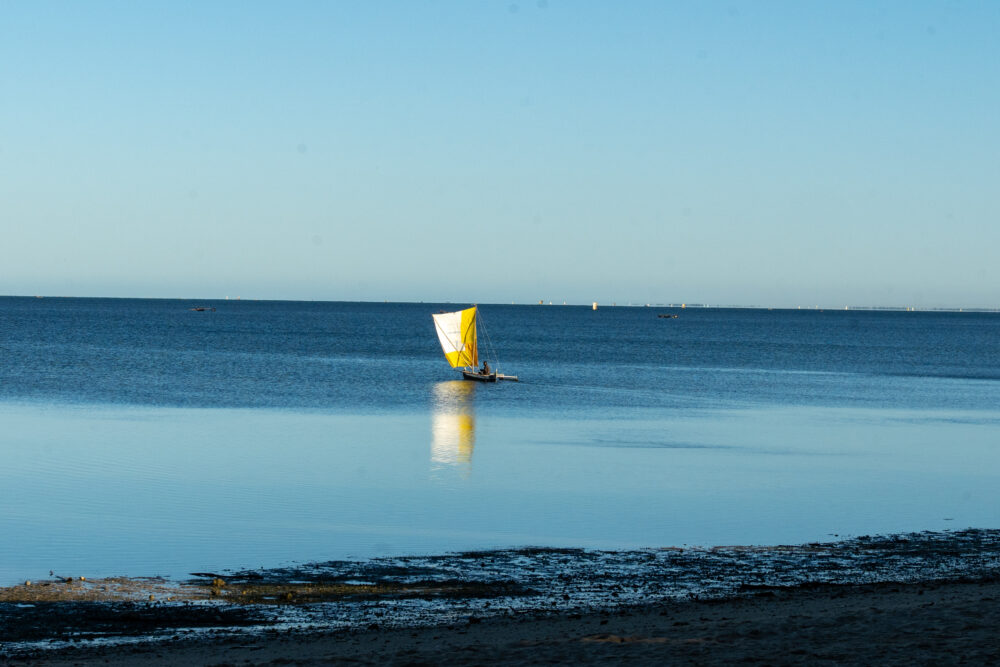
After a long day of driving, we just decided on a whim to book a beach bungalow instead of trying to camp. With so many people around, finding a wild camping spot was basically impossible, and we didn’t feel like going door to door asking if we could camp in someone’s parking lot.
Where to Stay in Ifaty
Our bungalow search in Ifaty led us to Sur la Plage Chez Cecil. A basic room was around 100,000 MGA ($22) for the night, and we cooked dinner on our beachy patio to save money. It also had secure parking for our car. While we never experienced any problems with security in Madagascar, locals bring it up a lot as something to watch out for.
After the RN7: My Madagascar Budget-Travel Road Trip Recommendation
If you’re adverse to flying on the not-so-highly-rated Mad Air, then you can simply drive the RN7 back the way you came. I don’t recommend this option however.
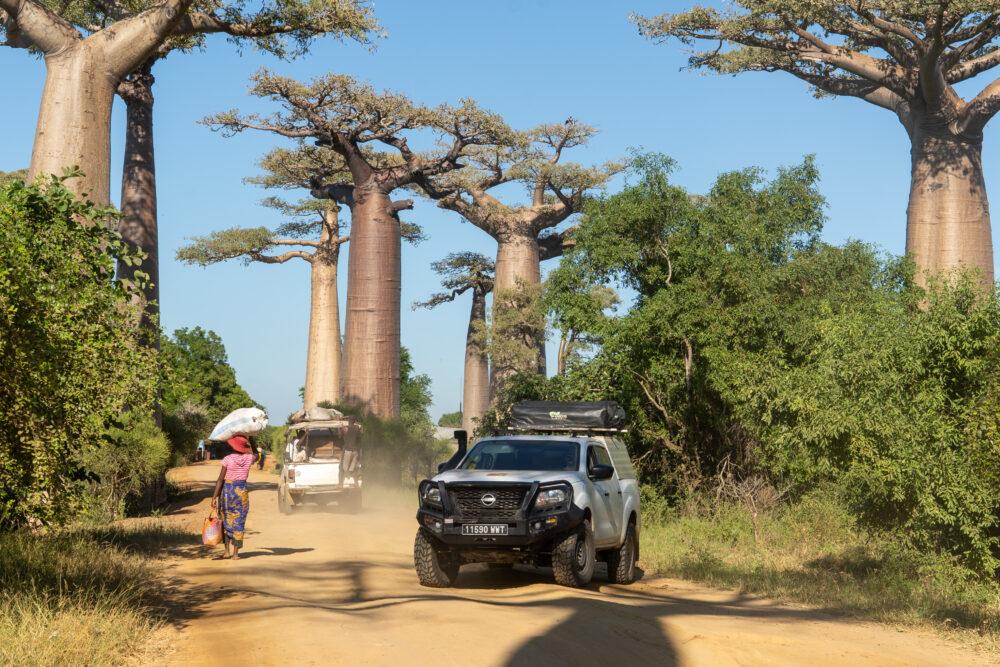
Most travelers arrange to leave their Road Trip Africa vehicle in Tulear and travel onward to Morondava by plane. This is the most popular option for road trippers to Madagascar as it eliminates ALL backtracking. It also gives you a chance to catch a ride to Tsingy or visit the Avenue de Baobab, two iconic Madagascar attractions found only in the Morondava area.
Another excellent flight idea is a relaxing getaway to Nosy Be. Or you can just return to Tana quickly and easily. Do be warned, however, that Madagascar Air notoriously cancels and delays flights, and you can only book via their website. It might not end up being that quick and easy after all.
My recommendation if you have another week in Madagascar? Take a flight to Morondava and then link up with a driver or group to visit the famous Tsingy de Bemahara. Adding those two destinations will give you a very well-rounded trip.
This 11-day Madagascar Itinerary is the most budget-friendly Madagascar road trip for self-drivers. Be sure to browse my other Madagascar blog posts for more essential information before you go.
Save This Budget-Friendly Madagascar Road Trip For Later!