This post may contain affiliate links. This just means I may receive a small commission at no extra cost to you for helping them promote their product or service. I don’t endorse any services I don’t personally use or recommend.
The Manaslu Circuit is quickly becoming the hot new trek in Nepal. This guide attempts to answer all your most pressing Manaslu questions. It’s designed for the “average hiker,” which is what I consider myself. If you’re well-versed in Nepal treks, it’s likely you’ll have much of this information already.
This year, I embarked on my first-ever multi-day hut-to-hut trek in Nepal. I’ve always loved hiking, but when it comes to long-distance treks, my experience is limited to hiking the Inca Trail and Colca Canyon in Peru. And Colca didn’t exactly go well for us due to the sweltering heat at altitude, mislabed Maps.me trail, and our decision to go without a guide. This time around, I had grand plans to start a workout regimen well in advance to get in great shape before the trip….but life got away from me, and truthfully, I pretty much just showed up and hoped that a good mental attitude alongside an experienced guide would bring me up the mountain.
I mean, I’m from the Pacific Northwest of the US and well-versed in day hikes into the mountains. Most Washington State hikes are brutal, so I’m used to it.
If this ill-advised spontaneity sounds like you, then this blog post is likely to be profoundly helpful.
I’ll cover when and why to choose Manaslu rather than the numerous other (often more popular) treks, what each day on the trail is like, so you’ll know exactly how much you’ll be suffering, and some expert tips I wish that I knew before we hit the trail.
This should help you decide if the Manaslu circuit is the right trek for you, put questions about permits to rest, help you choose the best guide agency, and answer the elusive question… Just how fit do you have to be to complete the Manaslu circuit?
While you’re in Nepal, be sure to check out Sapana Village Lodge in Chitwan National Park to see the rare Asiatic rhinos and support their elephant rescue program.
A Quick Overview of the Manaslu Circuit
- Trail Length: 175km/109mi
- Duration: 13 days (without the Tsum Valley)
- Difficulty: Suitable for all ages. Relatively good fitness required.
- Start/End: Machha Khola to Besisahar
- Elevation Change: Overall 20,000m (roughly). 11,000m up and 9,000m down
- Max Altitude: 5,100m
- Guide Required
- Trip Cost: $995 per person.
- Discount Code: BUCKETLIST5 for 5% off Himalayan Masters treks
Why Choose the Manaslu Circuit?
In short, the Manaslu Trek is a quieter and more scenic alternative to the most popular trails in Nepal.
There are two main reasons trekkers choose Manaslu over other Himalayan circuits.
- They are hoping to escape the infuriating crowds of the iconic circuits like ABC (Annapurna Base Camp), EBC (Everest Base Camp), and Lang Tang Valley.
- They know that Manaslu offers an unrivaled glimpse into the varied ecosystems, subcultures, and overall incredible landscapes of Nepal’s mountains.
Both of which are perfectly good reasons to opt for the Manaslu Circuit Trek.
This trail (for now) is still far less crowded and developed than either ABC or EBC despite its steady gain in notoriety. You will not have to jostle for space on single tracks cutting through the cliffsides, and you can still enjoy the unspoilt natural landscapes you’re coming to Nepal for in the first place. While ABC saw nearly 250,000 trekkers in the 2024 season, EBC got 50,000, and Manaslu got a mere 12,000.
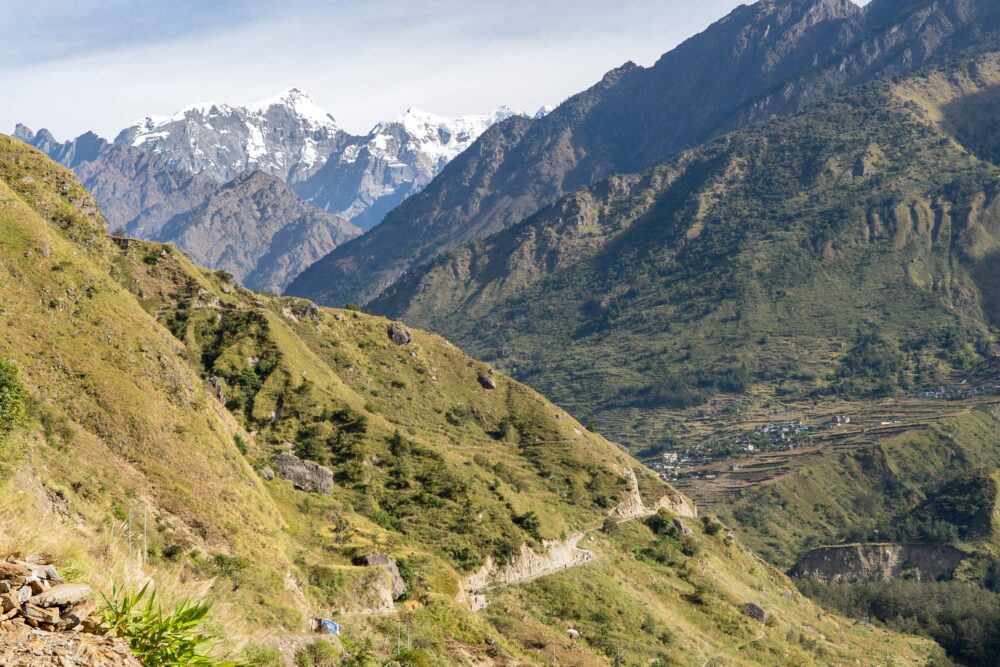
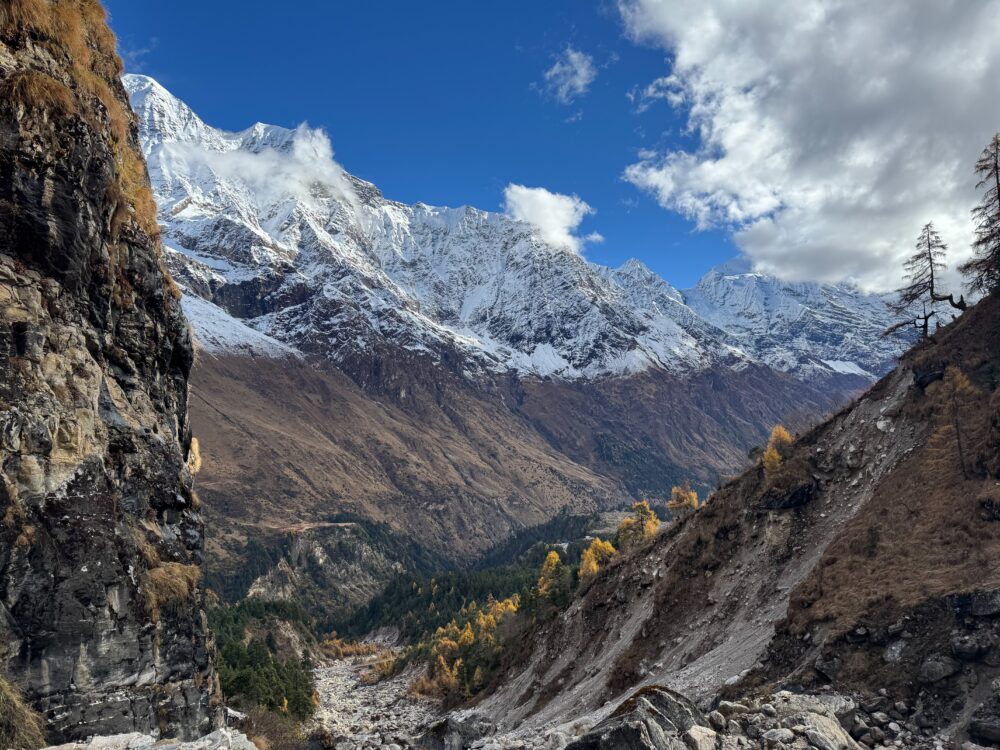
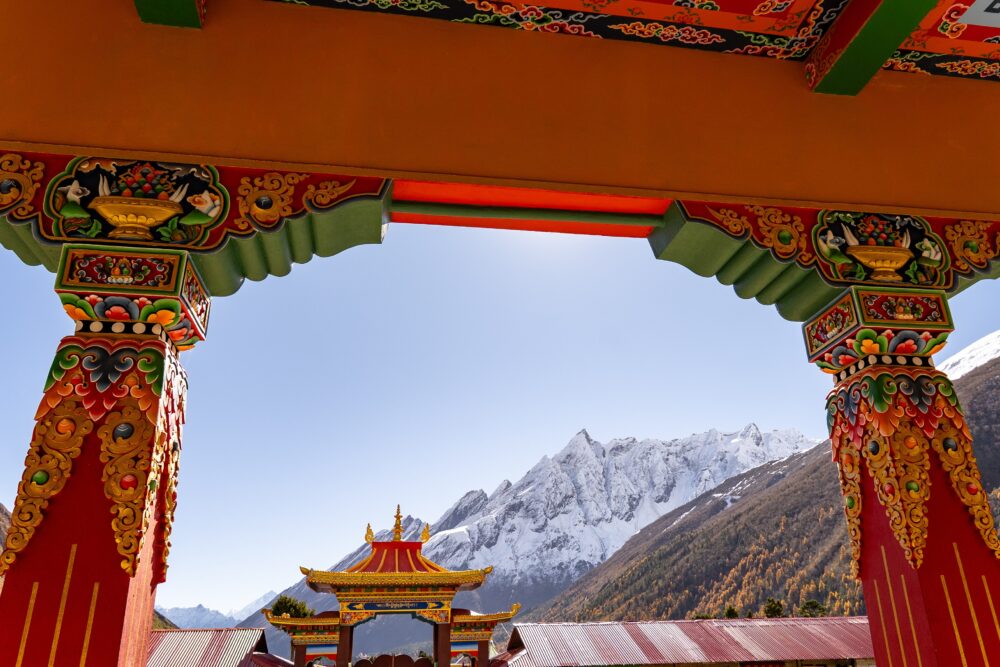
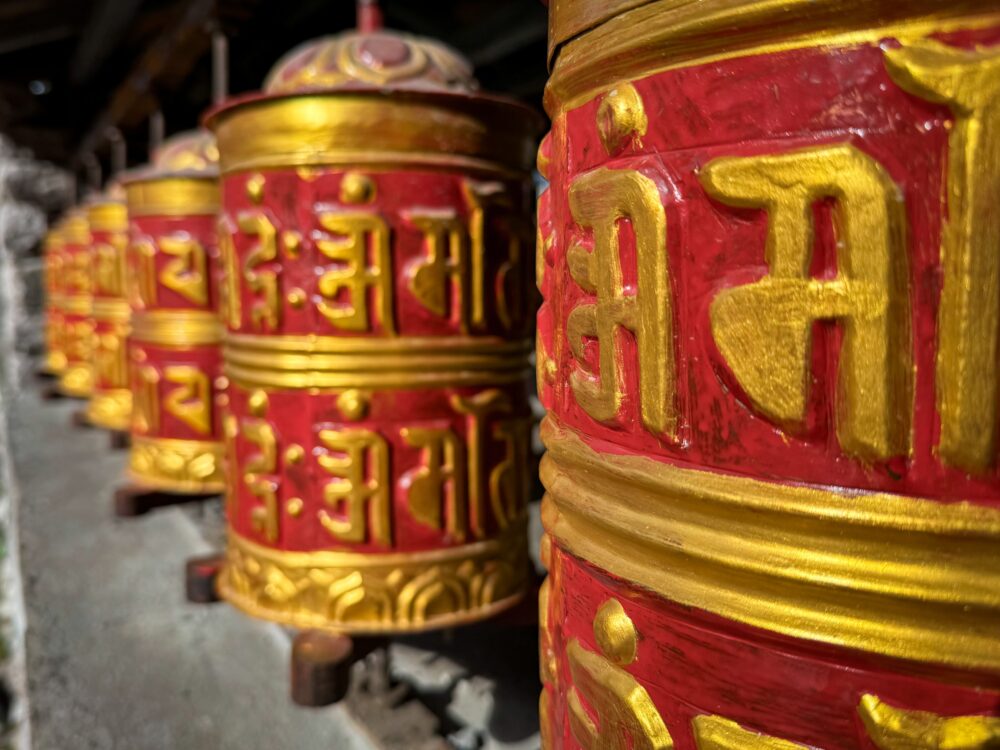
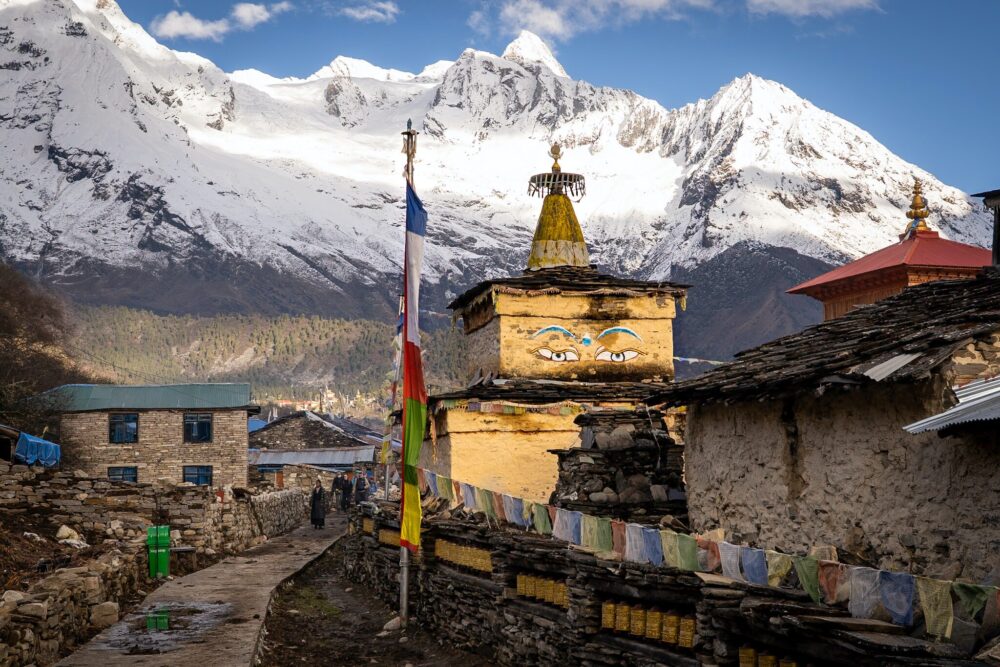
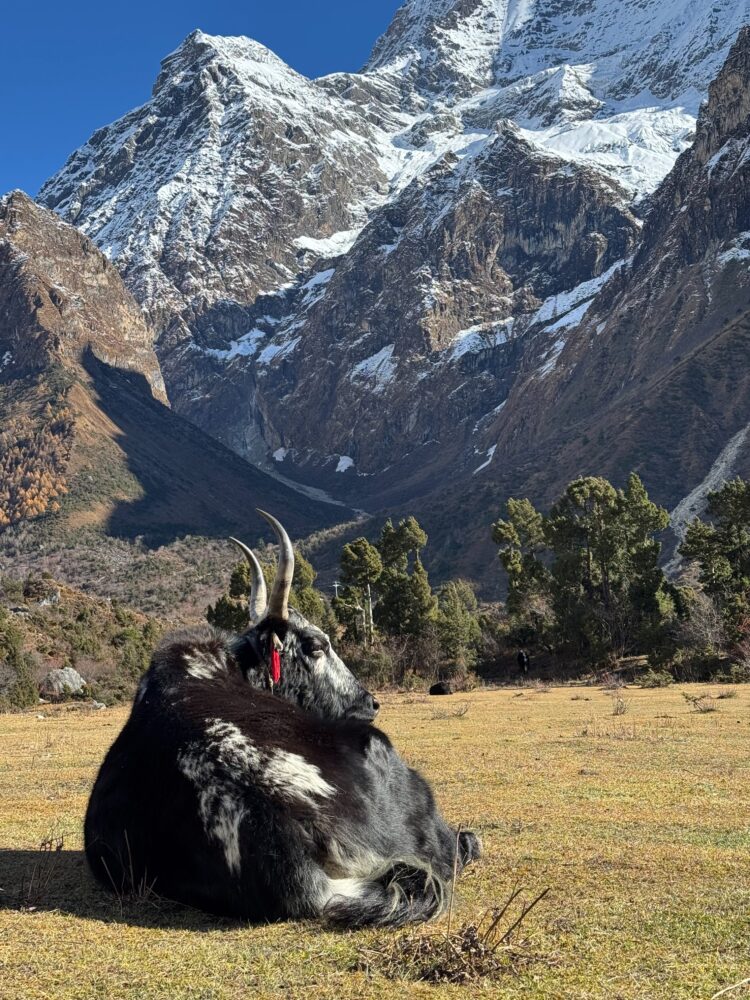
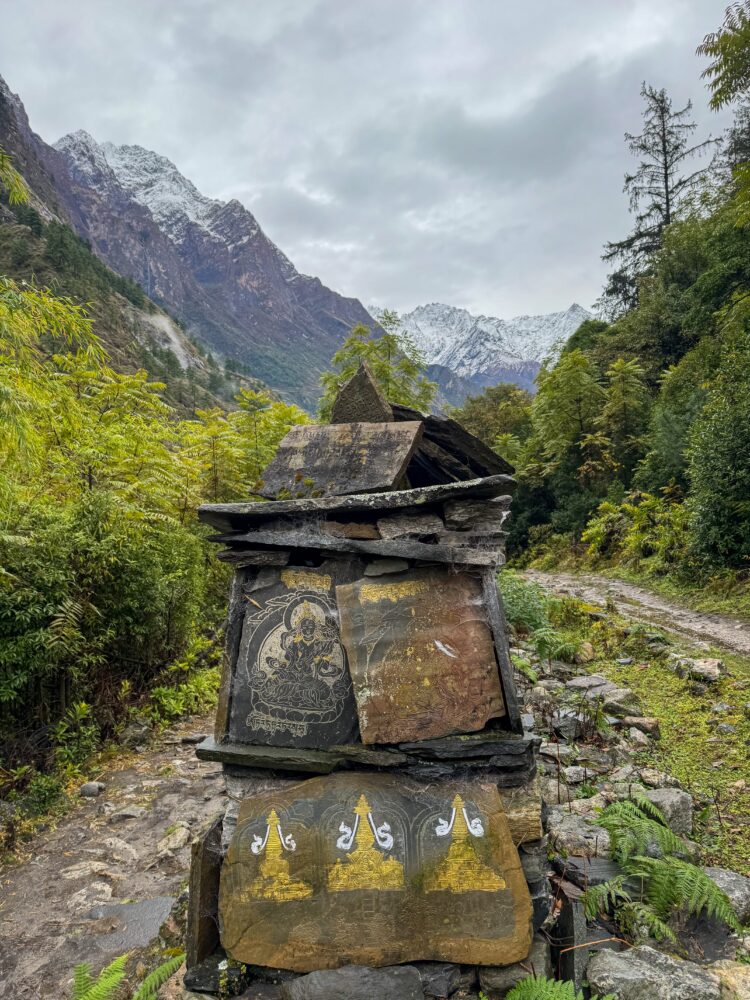
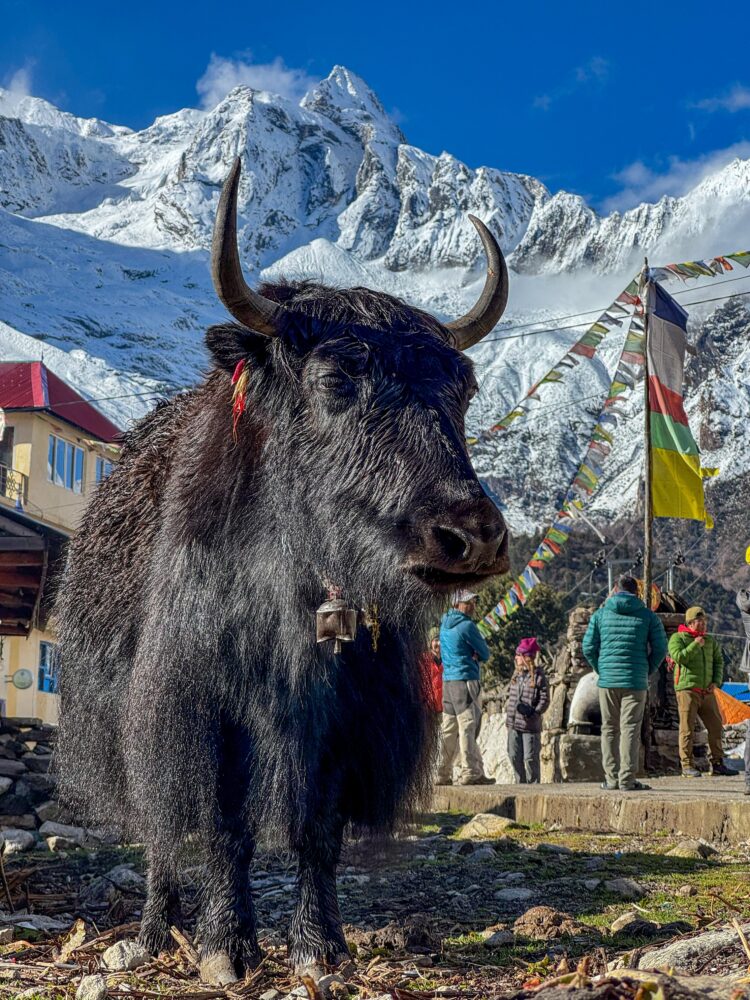
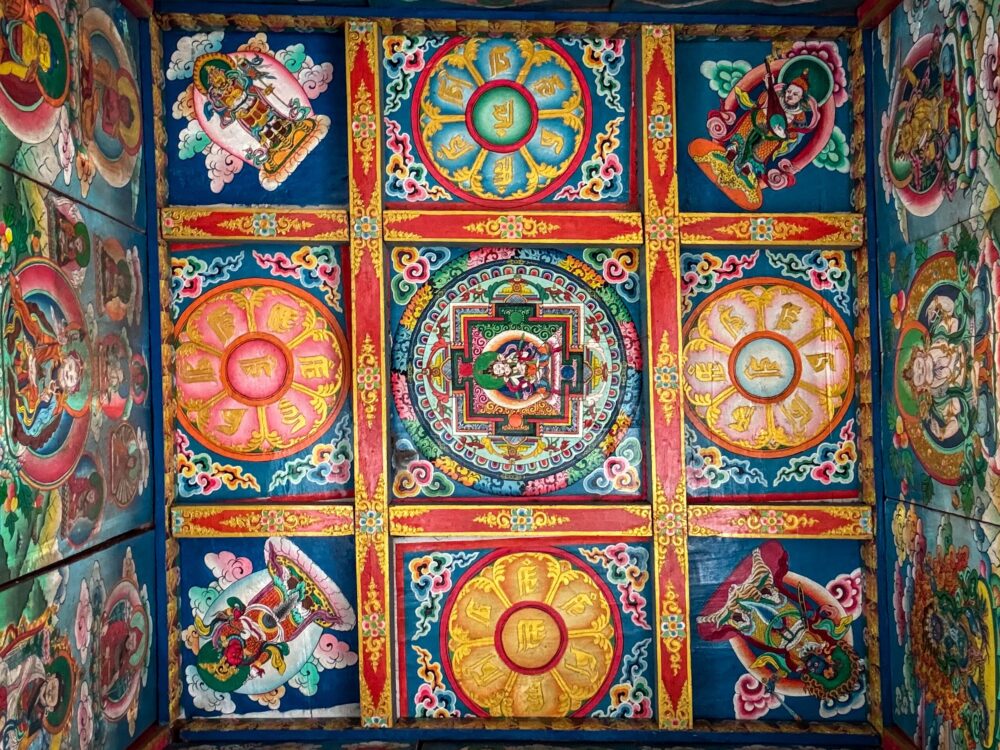
As for diversity, the Manaslu Conservation Area starts at around 600m in elevation and climbs to 5,000m, covering nearly all the possible ecosystems in one single trek. You’ll see Sub-Tropical and Alpine Forests as well as Glaciated Peaks. But it’s not just the environment, it’s also the attractions. This region is a cultural hotspot with unique mountain communities, lots of Tibetan Buddhism influence, cliffside monasteries, stunning glacial lakes, swinging suspension bridges, side excursions to the Tibetan Border, and, of course, the opportunity to reach a base camp and brag to all your friends.
How Long is the Manaslu Circuit Trek?
13 days. But only 11 of those are trekking days.
This is the minimum amount of time that you should allot to complete the Manaslu Circuit. Some travelers pressed for time will try to squeeze it in with only 10 or 11 days, but it’s really, really not recommended to do so. The trail will be challenging enough as it is.
If you’re talking distance, the actual trail length according to the itinerary I lay out below is about 175km/109mi if you embark on the included acclimatization treks. It’s 142km/89mi if you only do the mandatory segments and about 245km/153mi if you add in the Tsum Valley.
Tsum Valley Side Quest
Every single experienced Nepal trekker and hiking enthusiast that we met said this was one of their favorite hikes in the country. Conveniently, the Tsum Valley trail is connected to the Manaslu Circuit.
The Tsum Valley is an isolated Buddhist pilgrimage site (called a beyul in Nepal) with spectacular views and lovely gompas. The area is surrounded by mountains, and the culture of the valley is totally different than elsewhere on the circuit.
Adding the Tsum Valley portion requires a minimum of 4 extra days, ideally an extra week. But I 1000% recommend it. We didn’t (because we didn’t know about it) and deeply regretted it.
WAIT! Read More: If you’re still deciding which trek to do in Nepal and are looking for an off-the-beaten-path route, check out my full guide to Nepal’s best crowd-free treks.
Does the Manaslu Circuit Require a Guide In 2026?
Technically speaking, as of 2023, all multi-day treks in Nepal‘s mountains require a guide. The reality of the situation on the ground is a little different though.
The Annapurna and Lang Tang region of Nepal doesn’t require any special permits, and you don’t really go through any checkpoints on the tracks. This means there’s no one really to check whether you have a guide. The Manaslu circuit, on the other hand, is different. This is a restricted area that traverses national parks and protected cultural regions, so you do need special permits, which will be scrutinized at numerous checkpoints along the trail.
So the short answer is, yes, you absolutely do need a guide to complete the Manaslu Circuit.
Because of this, the Manaslu Circuit and all other tracks that require a guide, for the duration of the journey, are slightly more expensive than self-guided excursions in the Annapurna and Lang Tang regions. This is also probably why it’s less crowded, though, so tradeoffs.
If you’re an experienced trekker and really hoping to go without a guide, I have a full blog post that covers all the different recommended treks through Nepal‘s Himalayas (COMING SOON***). If you don’t have a lot of self-guided trekking experience, however, there are many reasons you should opt for a guide in Nepal, one of which is that the Himalayas are a volatile region, whose weather and conditions can change on a dime.
Begging the Question: What Guide/Trekking Company is Best?
We used Himalayan Masters and could not have been happier with our experience on the trail.
A quick Google search of any popular trek will show that Himalayan Masters is one of the most well-known and highly rated trekking companies in Nepal. This is for good reason.
Their prices are competitive with any of the other major trekking companies, they pay and treat their porters and guides well, they have an extensive network of people who keep an eye on trail conditions to ensure their trekkers are safe, and the best part…it’s a 100% Nepali-owned company.
Score 5% Off Your Himalayan Masters Trek
While I don’t have an affiliate link to direct you to, you can use the code BUCKETLIST5 to get 5% off your Himalayan Masters Trek (even if you don’t choose Manaslu). Just pop the code in when booking or mention it in any email with Himalayan Masters.
You’ll notice I don’t work with a lot of companies in my blog posts. This is because, while yes, I am a full-time traveler who is (attempting) to make a living from this blog, I don’t want to recommend or push you towards companies and activities I wouldn’t spend my own hard-earned money on just so that I can make a few extra bucks. Guided treks by Himalayan Masters are worth the money. Take my word for it.
Obviously, I get a little kick-back that helps to fund this blog if you use my code or mention that you got your recommendation from me! It saves you money and helps me keep this blog going.
Should You Go With an Independent Guide for Your Trek?
Independent Guide = Freelance Guide not associated with any major trekking agency.
Many budget travelers will consider skipping the big companies and hiring a freelance guide from a WhatsApp group or Facebook. They are usually cheaper. They are also usually less experienced or novice guides because if they *could* get a job with one of the major trekking companies (of which there are many) in Nepal, they would. It would mean regular, well-paid work.
While all trekking guides do need to be licensed to work in Nepal, the license doesn’t necessarily mean a whole lot.
We saw many groups led by freelance guides in the mountains, and more often than not, these were the groups that ran into weather-related trouble, altitude-related illnesses, and had difficulty securing beds in small villages along the route.
So yes, you can save a little money by opting for a freelance guide, but you pretty much lose all the benefits of an experienced mountaineer. Unless you yourself are well-versed in multi-day treks and only getting a guide because the Nepalese government requires it, I wouldn’t go the freelance route.
Other Considerations When Choosing Your Guide
If you do decide to go the freelance route, you should talk to a lot of guides before making your decision. For starters, ensure they speak English well, are actually certified, have done the trek before, and inquire about whether or not they plan to drink alcohol while on the trek.
This is actually pretty common among the new young guides, so determine if that is something you are comfortable with beforehand. It can definitely affect your safety in the mountains. Another item to hammer out is the exact details of pay. Be sure the guide doesn’t expect you to pay for their lodging and food along the route (that would not be typical), and what you expect from your accommodation along the way.
A Few Other Reasons We Loved Himalayan Masters
Let me gush over our Himalayan Masters experience for a little longer.
Our guide (Dharma) was kind, professional, and super positive. We experienced some really bad weather on the route (thank you, climate change), and he kept our spirits up, kept us moving up the trail, and went above and beyond when we got stuck in a rainstorm. He literally roasted our clothes over a fire to dry them after a rainstorm while we waited, fully naked, in a teahouse bedroom.
Teahouses hold rooms for Himalayan Masters. This is a perk of being in the trade for ages. They have all the mountain town connections. While freelance guides and others just have to show up and hope that a room is still vacant, Himalayan Masters are guaranteed rooms. When rooms fill up, teahouses put you in a tent outside. While I love tent-camping, it definitely isn’t my preferred method of sleep when on a lengthy trek like this.
Himalayan Masters guides also carry a pulse oximeter and supplemental oxygen just in case of altitude-related emergencies. Altitude sickness is a life-threatening emergency and can come on quickly. It’s so important that your guide is equipped to handle this.
They are fully transparent with their trek prices. There’s nothing I hate more than researching online and having to enquire via email to even get a ballpark range for the price. All the trek prices are listed plainly on the Himalayan Masters website.
You can choose between private tours and group treks. Himalayan Masters has the option for private tours as well as their group treks. This way, you can decide just how social you’re looking to be in the mountains.
What Permits Do I Need?
Fortunately, this is information you don’t really need to know!
While you do need permits for the Manaslu Conservation area, your trekking guide will handle all this for you, and it’s included in the price of the trek. For Manaslu, the permits (not including Tsum Valley) cost around $100 per person.
Manaslu Circuit Route Map
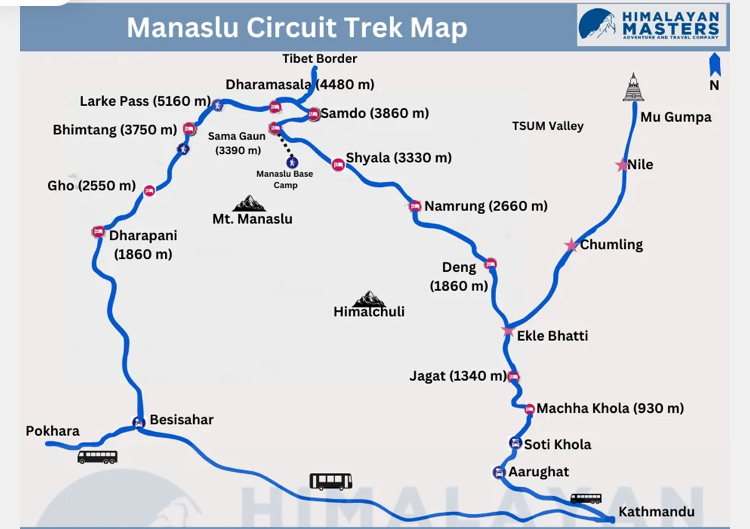
A Quick Day-by-Day Route Overview of the Manaslu Circuit Trek
Now that I’ve covered the basics, let’s look at a breakdown of what to expect on the Manaslu Circuit trek, and our firsthand experience of how each day went.
Don’t forget you can use the code Bucketlist5 to get 5% off your Himalayan Masters Trek.
Day One: Bus or Private Car from Kathmandu to Machha Khola
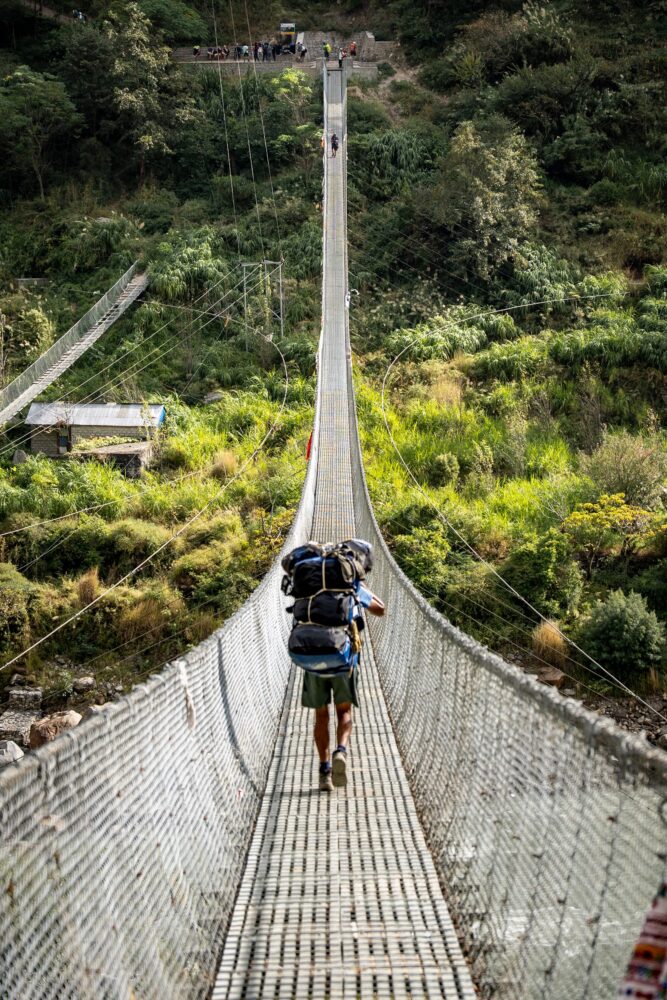
- Town Rating: 2 out of 5 stars. Decently pretty area, alright food, small suspension bridge to see, very loud.
The first day on the trip, you’ll spend the full time just getting to the trailhead. You’ll either take the public bus (very uncomfortable, but far more affordable) or hop in a private car (still pretty uncomfortable on the bumpy road) to Machha Khola.
This bumpy off-road track used to be a part of the trek itself, but as the road has progressed through the mountains, you can now drive further. No point in walking on a roadside.
Machha Khola is an alright town. There isn’t a whole lot that stands out about it. It’s one of the largest villages you’ll stay in on this trek, and unfortunately, as it is the trailhead, it’s also quite busy, which means it’s quite loud at night and in the morning. This was the biggest downside and the main reason we didn’t love this particular town.
Day Two: Machha Khola to Jagat
- Distance: 20km/12.43mi, 6-7 hours of trekking
- Difficulty Level: Medium
- Town Rating: 2 out of 5
Today, you leave nice and early to get a feel for your personal pace on the trail. I recommend leaving before 7 AM each day so you can be sure to get the trail to yourself. The bulk of the herd leaves at 7:30 AM each morning. While the route today is long-ish, it was quite easy until right before lunch. The trail is mostly flat and meandering; in fact, as of 2025, it follows the dirt road for much of the first 10 km before becoming a single footpath.
The biggest hurdle? It’s HOT. At a maximum of 1340m, the trail at this elevation is blazing hot even in November. There is little shade at this section of the valley, so you’ll want to get going nice and early just for comfort’s sake.
Just before you stop for lunch, you’ll cross a hot, rocky area and gain quite a bit of the day’s elevation. Because this is later in the day, it’s pretty exhausting, which is why I ranked today a medium.
Jagat isn’t much to write home about. In fact, it had some of my least favorite food, basic rooms, and seemed a little overcrowded, as it’s still early in the trail. Still, there is one of the only places to get real coffee in town. Take advantage of this.
Day Three: Jagat to Deng
- Distance: 22km/13.6mi, 7-8 hours trekking
- Difficulty Level: Easy
- Town Rating: 5 out of 5
Even though today is technically longer than yesterday, I found it easier, and I was much less spent by the time we landed in Deng. Maybe it’s because this is when the trail really starts to get that fairytale scenery.
Deng had great food, comfy, quiet rooms, and was spectacularly pretty.
Day Four: Deng to Namrung
- Distance: 19km/11.87mi, 6-7 hours of trekking
- Difficulty Level: Medium
- Town Rating: 4 out of 5
Welcome to your first climb day. The trail is really going to begin its upward push today. And it’s all at the end of the day. Lucky you. You’ll end the day at 2630 m/ 8628 ft in the quiet town of Namrung. This is where, thanks to the Himalayan Masters itinerary, the crowds will start to thin out.
Day Five: Namrung to Shyala
- Distance: 16.5km, 10.3mi, 4-5 hours of trekking
- Difficulty Level: Medium
- Town Rating: 4 out of 5
While many other trekkers will spend the night in Lho (a loud, less than desirable town) you’ll get all the way to Shyala. This town sits at 3500 m/11483 ft, so you’ll really begin your acclimatization here.
Day Six: Shyala to Samagaon via Pyungen Monastery
- Distance: 17km/10.6mi, 4-5 hours
- Difficulty Level: Medium
- Town Rating: 5 out of 5
This is arguably the most scenic day on the trek. Getting to Pyungen Monastery is breathtaking, and getting to take this route is one of the main perks of staying overnight in Shyala the night before. Many other trekkers will visit Pyungen Monastery on a day trip from Samagaon, which is an out-and-back on a brutal trail that’s all elevation gain (until the descent that is). This route allows you to take a slightly more meandering path and skip all the straight uphill nonsense.
Samagaon is a sprawling town that has loads to see, several acclimatization hikes, and is super scenic in itself. Food is excellent, and while the rooms are basic and cold as ice, it’s quiet. You can spend some time here enjoying the nearby monastery and glacier lake while you wait out the weather on the pass above you if need be.
At 3530m you’ve reached an acclimatization point and the first place on the trek you’ll spend more than one single night.
Day Seven: Rest Day at Samagaon or Push to Manaslu Base Camp
- Distance: **if you trek** 13.2 km/ 8.2mi., 8 hours of trekking
- Difficulty Level: Hard
Today is either a built-in rest day OR a brutal hike with loads of elevation gain to the Manaslu Base Camp at 4800 m. Not the highest point on this trek, but certainly one of them. If the weather isn’t great, you’ll obviously skip this excursion. But if you’re feeling unaffected by altitude and ready for a serious challenge, then you should absolutely go for it.
This is probably the most difficult day on the trek (alongside the high pass), so think carefully about whether you are up for it or not.
I know that most people really set their sights on reaching base camp on their Nepal treks, but the Manaslu Base Camp isn’t actually on the circuit the way that ABC and EBC are. This is a steep out-and-back day trail. You’ll probably want to do some training if you’re committed to reaching it AND still making it over the main pass.
Day Eight: Trek from Samagaon to Samdo
- Distance: 5.1km/3.16mi, 2-3 hours of trekking
- Difficulty Level: Easy
- Town Rating: 4 out of 5
Reaching Samdo is a relatively easy walk. As easy as anything is at 3875 m/12,713 ft, that is. This is built in to be a semi-relaxed day where you can assess how you’re doing with the elevation and continue to acclimatize.
Day Nine: Rest Day at Samdo Or Side Trip to Tibetan Border
- Distance: **if you trek** 19.5 km/ 12.1mi.
- Difficulty Level: Hard
Some trekkers really get set on reaching the Tibetan border. And on this acclimatization day trip, you can. After a long, difficult day, you’ll reach a viewpoint overlooking the sea of trees that is Tibet before turning around and heading back to Samdo. If you’re struggling at all from Altitude, this is a good one to sit out. The base camp side quest is more scenic than this one if you’re going to choose between the two.
Day Ten: Trek from Samdo to Dharmasala
- Distance: 6.1 km/ 3.8mi, 3-4 hours of trekking
- Difficulty Level: Medium
- Town Rating: 2 out of 5
Welcome to the final day before you summit the formidable Larkya La Pass. While it’s not a particularly long day on the trail, it will be a steady incline and reach nearly 15,000ft or 4460m. Dharamsala is a very small town with few amenities. But you won’t be here for long.
After a cold stay here (where you’ll share rooms with the others staying at the teahouse), you’ll be waking up at 3 AM to make your push over the pass.
Day Eleven: Trek from Dharmasala to Bhimtang via Larkya La Pass
- Distance: 16 km/ 9.9mi, 8 hours of trekking
- Difficulty Level: Hard
- Town Rating: 4 out of 5
This is the day you’ve likely been dreading since the very beginning of the trip if you’re an anxious hiker. Or maybe you’ve been looking forward to this moment. Either way, it’s going to begin around 3 AM in the freezing-cold, high-altitude air. This is because the weather is the most stable in the morning, and you need to give yourself ample time to get over the pass.
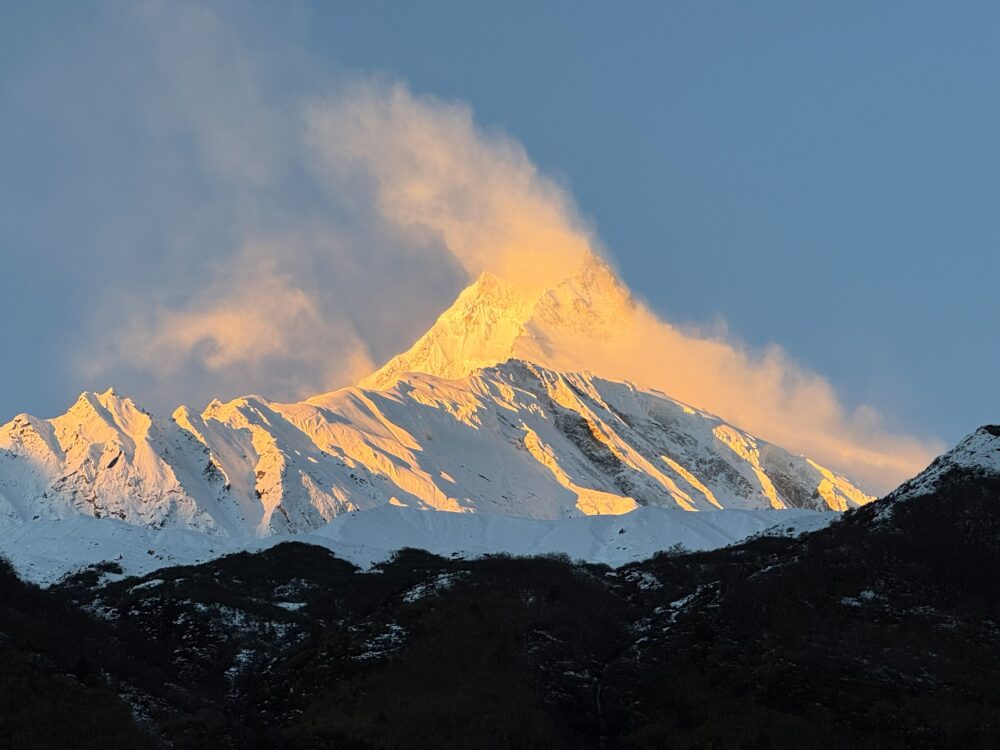
The pass sits at a snowy 5,106m/16,752ft and is the high point of this trek. You’ll spend most of your day getting up it and posing for photos at the top before the hard part really begins….the knee-shattering descent down the steep other side of the pass after you’re already exhausted.
Unfortunately, this is where people usually fall and hurt themselves if they are going to. Make sure you are mentally and physically prepared (with snacks) for the challenging afternoon as you make your way to the beautiful mountain town of Bhimtang. This is a super photogenic place.
Day Twelve: Trek from Bhimtang to Tilje and drive to Besisahar
- Distance: 20 km/ 12.4mi, 5-6 hours of trekking followed by a short drive
- Difficulty Level: Medium
- Town Rating: 3 out of 5
Congrats, you’ve made it to the very last day of the trek! Well, when it comes to walking anyway.
This is a recommended slight Himalayan Masters modification. You’ll only trek to Tilje, which is when the trail becomes a dirt road passable by cars. Then you can hitch a ride (arranged ahead of time, not literally hitch-hiking) to your final sleeping point on the trail– Besisahar.
Day Thirteen: Drive back to Kathmandu from Besisahar
Today, you’ll get an early morning start to either take the local bus or a private car back to the capital of Kathmandu.
Congrats, you’ve completed the entire Manaslu Circuit!!!
Where to Stay in Kathmandu
If you’re looking for the best place to stay in Kathmandu, look no further than My Garden House. It’s centrally located to all the attractions, near the buses for Chitwan National Park, affordable, and very comfortable. The host is absolutely lovely and can help you arrange your entire Nepal trip.
Common Manaslu Circuit Questions
Let’s go over a few questions that most travelers have when they are first looking to trek in Nepal.
Best Time of Year for the Manaslu Circuit
There are essentially two trekking seasons in Nepal.
- March to May: This is also climbing season. You can expect warmer temperatures at the tail-end of this season and heavily snowed peaks.
- September to November: Widely considered the “best” time as it tends to be drier and clear skies albiet cold.

We visited in November, which, according to most guides, is the best time to trek Manaslu. Unfortunately, even this relatively stable time of year has been affected by climate change, and now, rain, which is historically unheard of, occurs occasionally at this time. That being said, I would still opt for late-October/early-November if I had my pick of the seasons.
June-August is monsoon season, and the mountain is very unstable, while in the winter, it is obviously too cold.
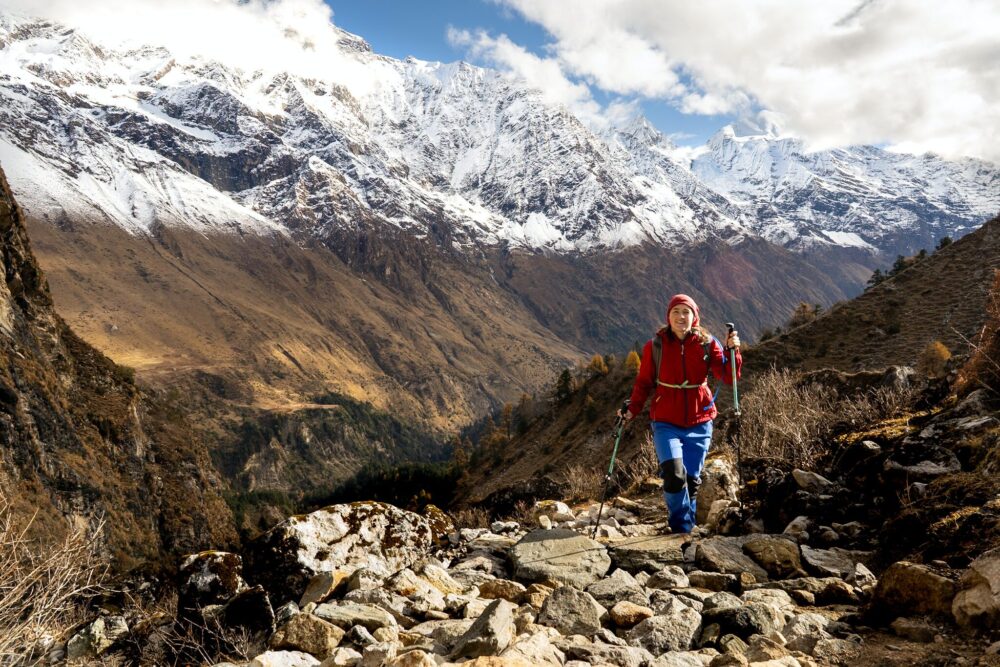
How Difficult Is Manaslu Compared to Other Treks in Nepal?
Manaslu is considered challenging.
It’s more difficult than the Annapurna Circuit and about the same as the Everest Base Camp. That being said, it’s very doable and has about a 97% success rate when it comes to completing the loop.
If you are relatively fit, you should be able to complete the loop with little training.
People of all ages trek this circuit, from the elderly to young kids. It’s not a technical endeavor. It’s just a long, meandering trail with a ton of elevation gain.
Do I Need Travel Insurance?
You 100% need very good travel insurance while you are in Nepal. Specifically, Travel Insurance that covers a helicopter rescue.
Not only could you easily fall and injure yourself or get sick along the way and require a helicopter rescue, but weather could also roll in, preventing you from crossing the pass. In these cases, the trail below you is usually unstable and unsafe as well, and most travelers opt for a helicopter rescue as the safest option.
The helicopter rescues in Nepal are private companies and cost about $5000 per helicopter in the Manaslu region.
It’s well worth getting travel insurance that covers this kind of expense. While many companies *technically* cover Heli rescue, it would be very beneficial to choose one that explicitly says they cover the heli for any reason. World Nomads is a great option. We used Seven Corners and have required a heli-rescue before. They *did* cover it, but it wasn’t exactly an easy process.
Do I Need a Porter AND a Guide?
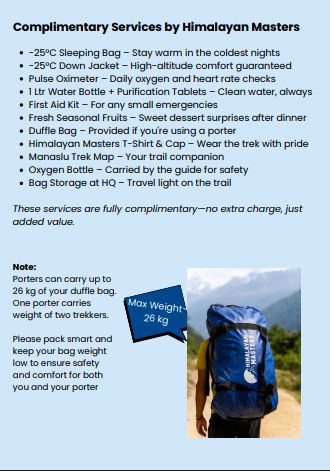
This is totally up to you. As someone of relatively decent fitness who loves to hike but had never embarked on a lengthy trek like this before, we opted to hire a porter as well as a guide.
A guide won’t carry any of your stuff. So, unless you are fit enough to hike 13+ miles per day at altitude carrying 10 kilos of gear (and enjoy yourself), I would use a porter.
While I respect people who want to do it entirely on their own, most porters have few other employment options, and it’s a great way to support local communities. Himalayan Masters tries to always make sure that your guide and porter are hired from communities surrounding your particular hike.
What’s the Deal With Porter Guides?
A porter/guide is usually a freelancer who agrees to do both tasks. They don’t typically carry as much as a traditional porter, but you can save some money by opting for this route. Just remember what I said about hiring freelancers rather than going with a reputable company.
How Much Do I Tip My Guide & Porter?
A lot of the information online says that you could tip your guide anywhere from 10% to 20% of the total cost of the trek, and to give your porter somewhere around five dollars per day.
Porters work really hard, so we chose to give our Porter $12 per day and our Guide 25% of the hike. We were also on a private tour, so we felt obliged to give a little more. If you’re joining one of the Himalayan Masters groups, it’s more than enough to stick to the general tip guidelines above per person.
Manaslu Circuit Tips + Things To Know
Let’s cover some odds and ends that you need to know to enjoy the Manaslu Circuit.
1. Rain Gear is Essential. Like Really Good Rain Gear.
We made the grave mistake of assuming that mildly rain-proof equipment would work for us (as it’s not supposed to rain in November), and were SOAKED when it did storm on the third day of our trek. You should invest in a very good rainproof outer layer and bring some plastic bags for your day pack.
Kathmandu has loads of shops selling knock-off outdoor gear. While most of it is of relatively good quality (and totally worth getting due to the low price), be sure to bring backup plastic bags and ponchos for the “waterproof” stuff.
2. Do not skip the sleeping bag.
We ran into a surprising number of trekkers (without porters) who had decided to skip the sleeping bag to save weight on the trip. The thinking is, you’ll be sleeping in teahouses along the way, so why does it matter? Because it’s f*cking cold. The teahouses don’t have fire heat in the rooms. Mostly, the rooms are just a bare bed with sheets on it and are absolutely freezing. I would not have survived without my sleeping bag. We had ones rated for -25C (these are provided when you trek with Himalayan Masters) and were still chilly sometimes.
You can ask for blankets at the teahouses, but they don’t always have enough.
3. Pack Strategic Snacks
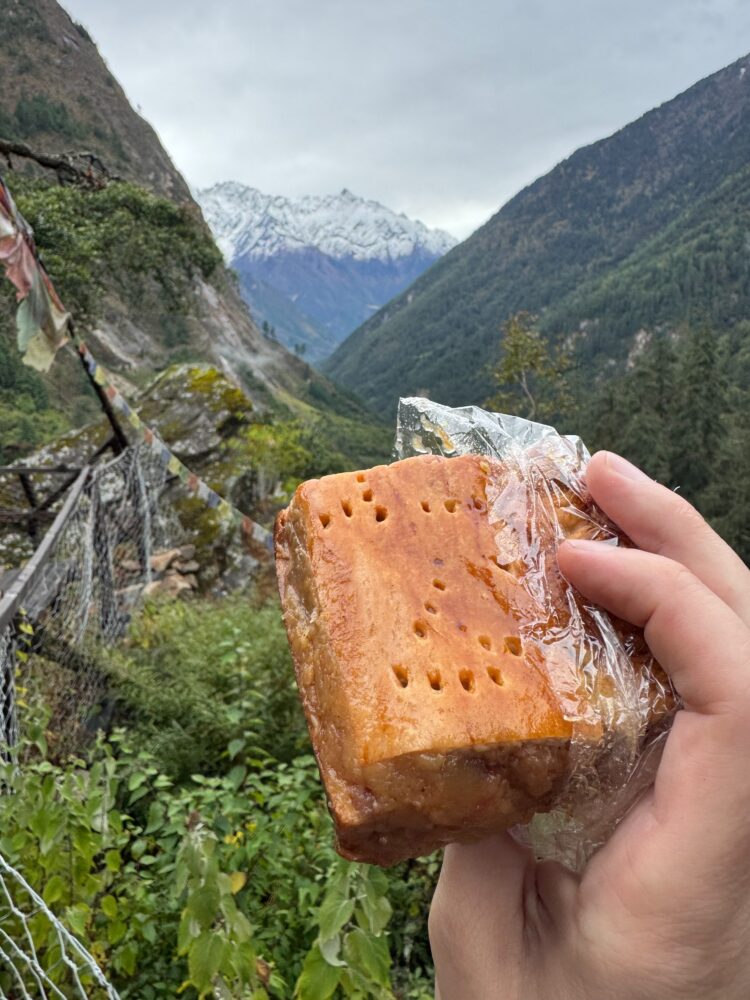
Snickers + Mountain Man bars will be a major morale booster on the trail. We brought one for every day of hiking and did not regret the extra weight.
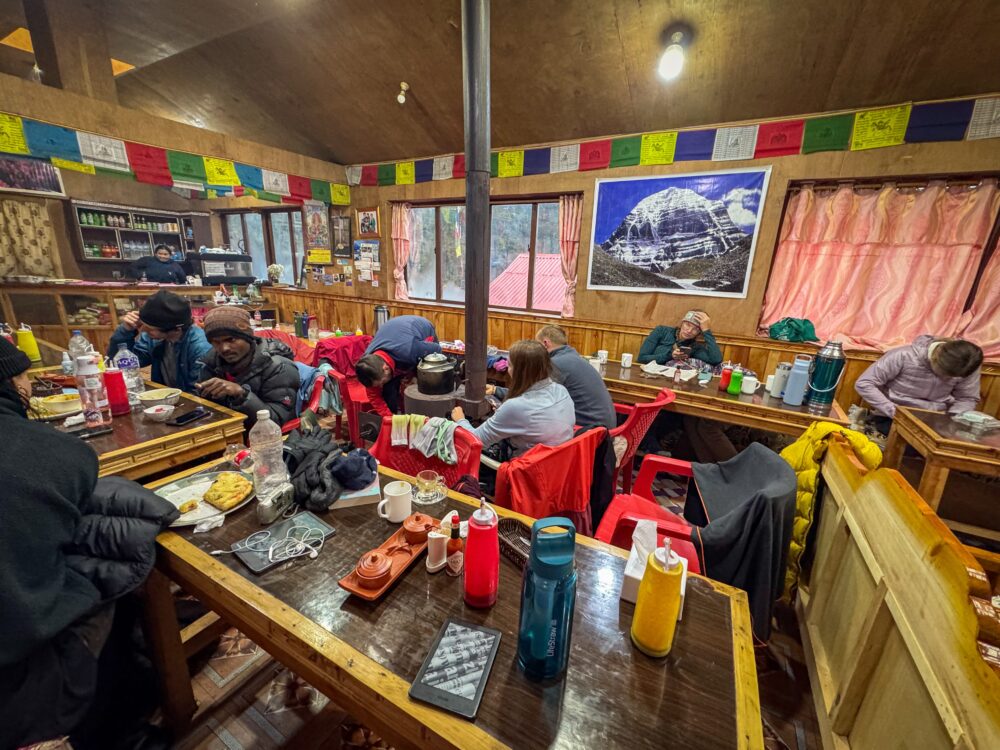
4. Teahouses on this trek are basic but comfortable.
As I mentioned, rooms are basic. Don’t expect anything more than a bed with a thin mattress on top. The good news is there is always a communal room that’s much warmer than the outdoors. Here, you can usually curl up by a fire, dry your damp clothes, drink tea, and socialize with other trekkers.
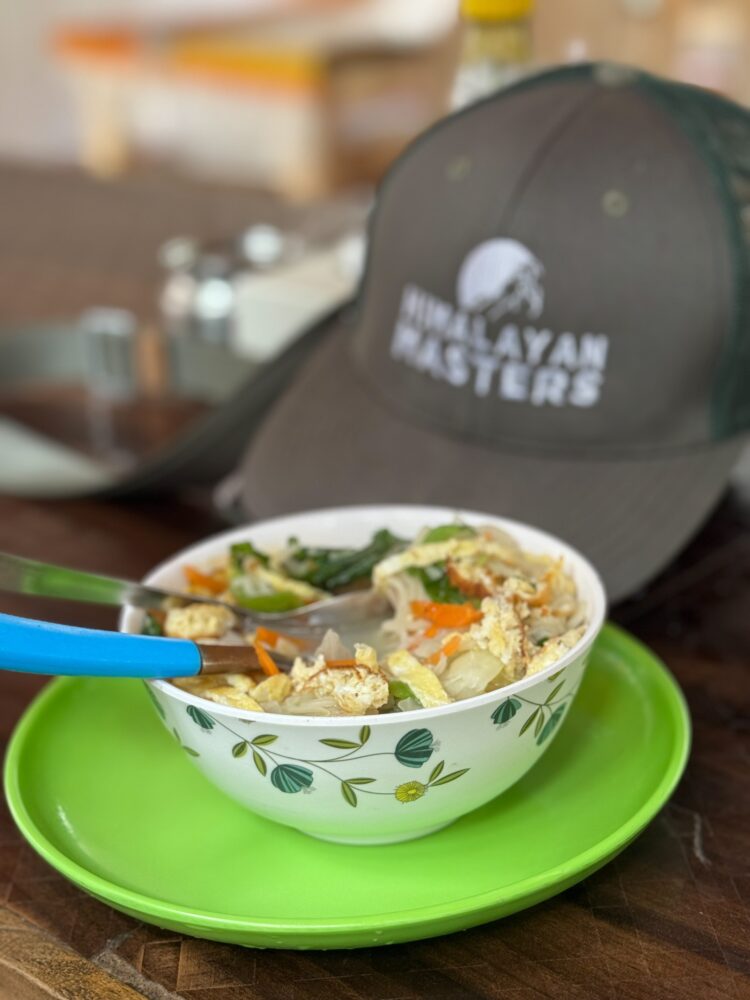
Food at the teahouses varies in quality, but not in dishes. Expect noodles and basic eats for most of the way. Samagaun was the one exception where we had lots of different choices, including pizza! While you might be reading this thinking, who orders pizza when you could get momos and other Nepali cuisine…remember that once you’ve been trekking for 10 days, eating the same things over and over.
What About Hot Water?
I’ll be real honest with you. I did not shower for about a week in the middle of the trek. It was too cold to fathom taking off my layers of clothing. While many teahouses will heat water for you (for a small fee), it just didn’t seem worth it to me. Earlier in the trek, it’s warm enough to take cool showers at the teahouses without a problem.
5. Spend as little time in Kathmandu before the trek as possible.
This is a weird recommendation, but it’s a common problem for trekkers in the Nepalese Himalaya. Kathmandu is one of the most polluted cities in the world when it comes to air quality. Unfortunately, this is usually at its worst during Nov, March, April, and May. All of which are popular months for trekking. Now, this isn’t a problem once you get to the mountains, but if you stay in Kathmandu too long beforehand, the damage may already be done.
Hard-core (smart) trekkers will arrive in Kathmandu with a mask on and head to the mountains ASAP.
Spend your time in Kathmandu at the end of your trip, when you can go home and not have to worry about getting sick and exacerbating any altitude symptoms.
6. Ginger-Lemon-Honey Tea will be your best friend.
By far the best drink on the teahouse menus. It’s also good at relieving any coughs and altitude-illness.
7. Flexibility is key.
Give yourself some extra days in case the weather doesn’t cooperate. You can’t control the mountains. Himalayan Masters does a good job at pacing the trek out so you have some rest days baked in (if you skip the long side quests), but don’t plan to return the day before your international flight or anything. Give yourself some time.
8. Dehydration is the biggest cause of a failed summit.
According to all the guides and the hospitals in Kathmandu, it’s not usually *just* altitude that gets people. It’s dehydration. This is what makes the altitude sickness kick in. You should be drinking 4 L of water per person per day during the trek. We drank 2 liters each before lunch, filled up our camelbacks, and then finished another 2 liters before reaching the day’s destination.
The dehydration sets in early on a trek like this. The first three days are hot and long, and people are feeling good at this point in the hike, so they don’t think about water. But then you’re set up for disaster later. Make sure you keep on top of your water every single day, starting on day one.
Water Tips: There is no clean water on the trail and plastic bottles are very limited so it’s not good to rely on. You should definitely bring your own filtration device and some water purification tablets to ensure that you have enough clean water for the whole journey.
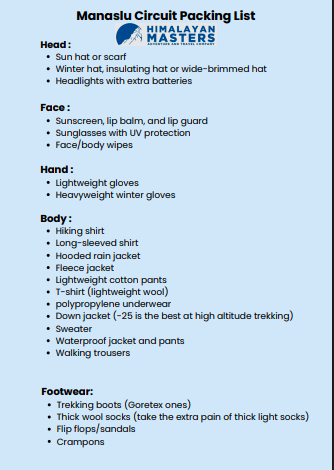
Manaslu Packing List
Let’s start with the packing list provided by Himalayan Masters.
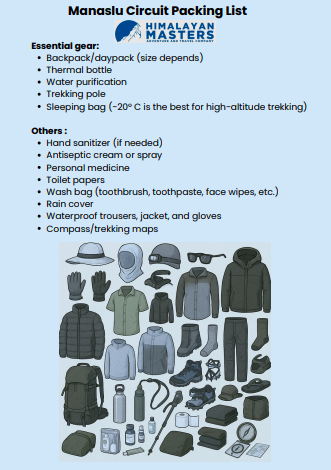
After having done the trek, here are my additional recommendations.
- If you want toilet paper, bring it along with you.
- Pharmacies in Nepal will give you everything over the counter. Stock up on antibiotics, cough drops, and lots of emergency first aid stuff before you hit the trail. Who knows what will happen out there?
- The hat, lip balm, sunglasses, + suncream are absolutely essential from the list above. A lot of the trail is exposed, and the sun is absolutely blinding at the elevation.
- We found a camelback (2L) to be the perfect water vessel for this trip. We also brought along our trusty Lifestraw but found it to be too small to rely on for our trekking water needs.
- Cut back on clothes. You will end up wearing the same outfit for days. You’ll just be adding layers.
- When it’s too cold to shower, baby wipes are a lifesaver. Bring some.
Before you go don’t forget you can use the code Bucketlist5 to get 5% off your Himalayan Masters Trek.
The Manaslu Circuit Trek delivered and then some. It was by far the most impressive and challenging hike I’ve ever tried, but was totally doable even with little to no training. This guide should answer all the questions you have before hitting the trail and heading to the mountains. Let me know in the comments if you have any other questions about the Manaslu region and treks in Nepal.
Save This Post For Later!